System Thread Exception Not Handled: How to Fix the BSOD
Fix the System Thread Exception Not Handled (0x1000007E) blue screen in Windows 10. Learn what causes it and how to repair faulty drivers in Safe Mode.
In this article
- What is the System Thread Exception not Handled Error?
- What Causes It?
- Quick Troubleshooting Tips
- How to Fix System Thread Exception not Handled
- Start Windows in Safe Mode
- Find the Faulty Driver in Event Viewer
- Fix 1: Update, Roll Back or Reinstall the Driver
- Fix 2: Run Windows Memory Diagnostic
- Fix 3: Update Your BIOS Firmware
- Fix 4: Repair System Files with SFC and DISM
- Fix 5: Check the Drive with CHKDSK
- Fix 6: Uninstall Recently Installed Programs
- Fix 7: Use System Restore
- Fix 8: Clean Install Windows
When something goes wrong on a PC, the usual first step is a restart. But what if the error itself is a crash that keeps the computer from starting at all? That is exactly what the SYSTEM_THREAD_EXCEPTION_NOT_HANDLED blue screen can do. This guide explains what causes it and walks you through the fixes, whether or not Windows still boots.
What is the System Thread Exception not Handled Error?
SYSTEM_THREAD_EXCEPTION_NOT_HANDLED is a Blue Screen of Death stop code, also shown as error 0x0000007E or 0x1000007E. It is most common on Windows 8, 8.1 and 10. It means a system thread, a piece of code running at the core of Windows, triggered an error that Windows could not handle.
For some people the blue screen appears a few minutes after Windows starts; for others it appears during startup, sending the PC into a loop of crashes and restarts.
What Causes It?
The main cause is a faulty, outdated or incompatible driver. Drivers often named on this blue screen include atikmdag.sys and nvlddmkm.sys (AMD and NVIDIA graphics), nwifi.sys (wireless networking), CMUDA.sys (USB audio), hdaudio.sys, a1600.sys, spuvcbv64.sys and brhostdrv.sys.
Other common causes are:
- Overclocking with voltages or memory frequencies set too aggressively
- Recently installed software that is not compatible with Windows 10
- Corrupted system files
- Faulty RAM or outdated firmware
Quick Troubleshooting Tips
- Check your drivers first. If you recently installed a new driver, uninstall it, look for an updated version or patch, and reinstall.
- Undo overclocking. If you recently overclocked the system, lower the voltage and memory frequency values step by step, or simply return everything to the default settings.
- Remove new software. If the crashes started after you installed a program, uninstall it.
If the blue screen appears so early that you cannot reach Windows or Safe Mode, you will need the recovery options described below, and in the worst case, a reinstall of Windows.
How to Fix System Thread Exception not Handled
The right method depends on whether your computer can still start Windows or Safe Mode.
Start Windows in Safe Mode
Safe Mode loads Windows with only the essential drivers, so the faulty one usually does not load and the system stays stable long enough to fix it.
- Enter the Windows Recovery Environment (WinRE). If Windows fails to start twice in a row, it usually opens automatically; otherwise boot from a Windows installation USB and choose Repair your computer.
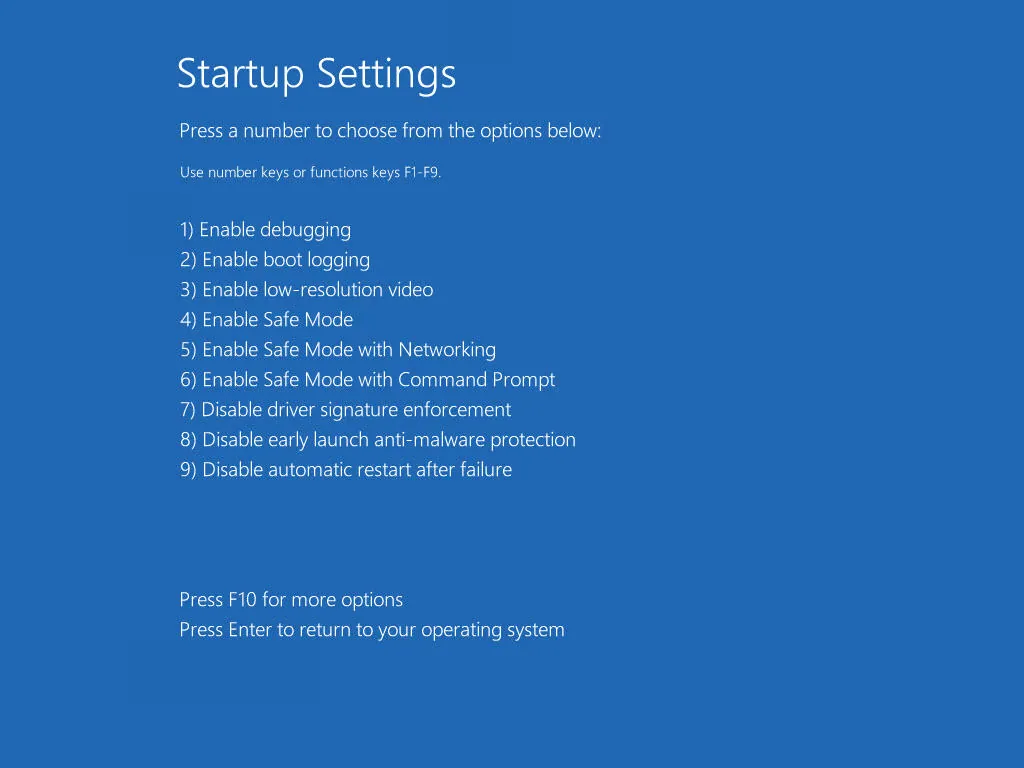
- Go to Troubleshoot > Advanced options > Startup Settings and click Restart.
- When the list appears, press F5 to choose Enable Safe Mode with Networking.
Find the Faulty Driver in Event Viewer
Once you are in Windows or Safe Mode, check the system log to identify the driver or device that caused the crash.
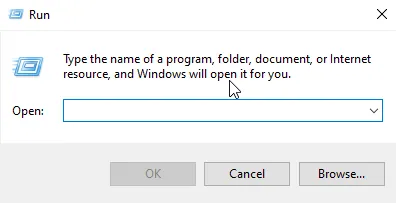
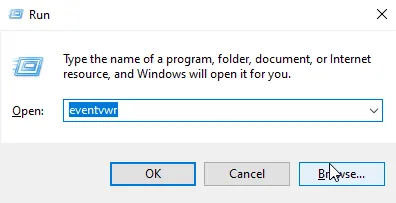
- Press Windows + R, type eventvwr and click OK.
- Go to Windows Logs > System.
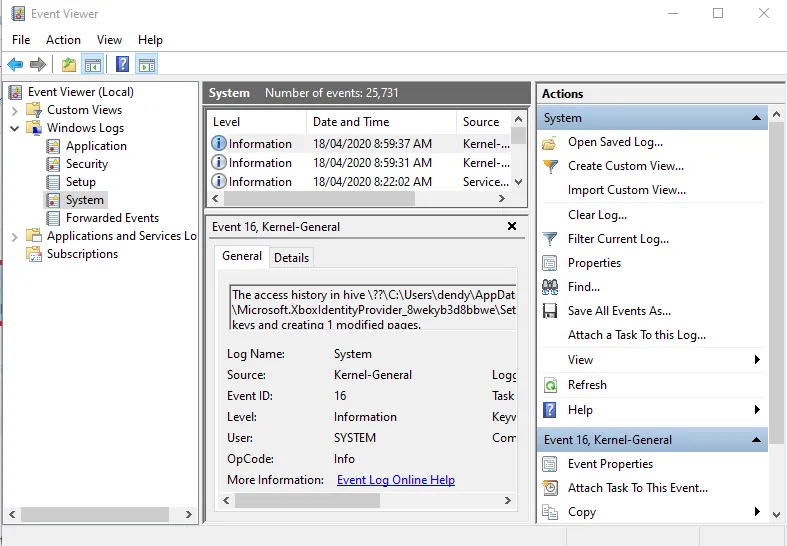
- Find the error entries logged around the time of the crash and open them to see the details.
Sometimes the culprit is obvious straight away, because the blue screen itself names a file. For example, if the error mentions atikmdag.sys or nvlddmkm.sys, the graphics driver is at fault; nwifi.sys points to the network card driver; CMUDA.sys points to the USB audio driver.
Fix 1: Update, Roll Back or Reinstall the Driver
This fix requires Windows or Safe Mode to start. It solves driver incompatibilities, the most common cause of this error.
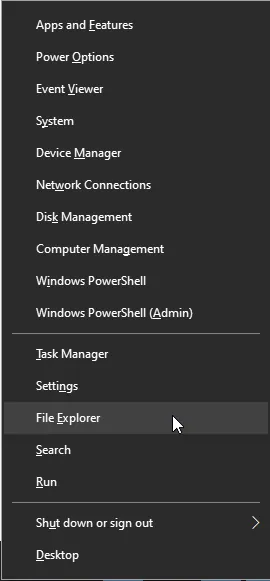
- Press Windows + X and choose Device Manager.
- Focus on the driver you identified, usually under Display adapters, Network adapters or Sound, video and game controllers.
To update the driver:
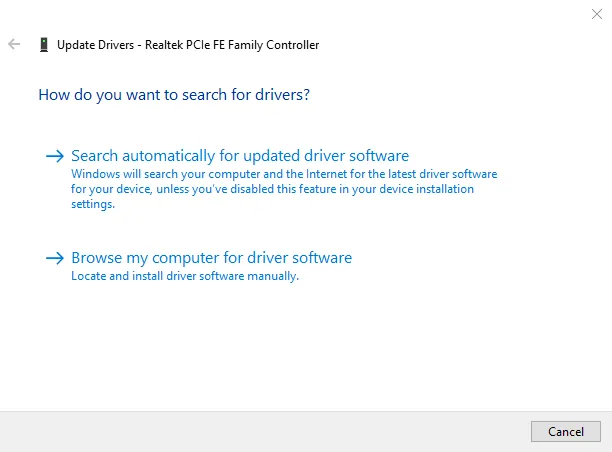
- Expand the category, right-click the device and choose Update driver.
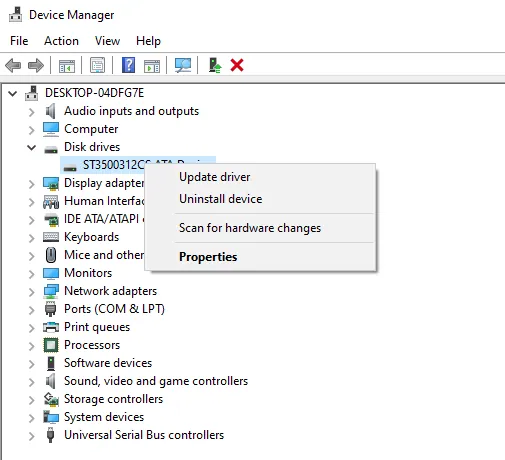
- Select Search automatically for updated driver software.
To roll back the driver (useful when the problem started after a driver update):
- Right-click the device and choose Properties.
- Open the Driver tab and click Roll Back Driver.
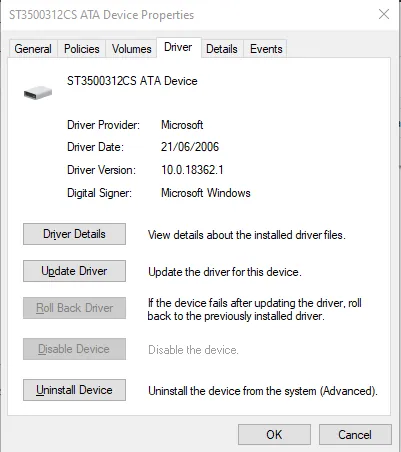
- Select a reason and click Yes.
To reinstall the driver: right-click the device, choose Uninstall device, then download the latest driver from the manufacturer's website and install it following their instructions.
Fix 2: Run Windows Memory Diagnostic
Faulty RAM can cause this blue screen too. Windows Memory Diagnostic checks your memory for errors.
- Start Windows or Safe Mode.
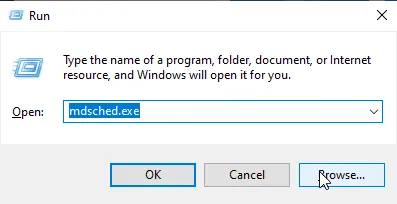
- Press Windows + R, type mdsched.exe and press Enter.
- Select Restart now and check for problems.
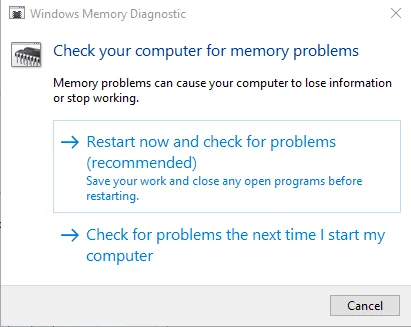
- Wait for the test to finish; it usually takes a few minutes.
- After Windows starts, view the result in Event Viewer under Windows Logs > System (look for the MemoryDiagnostics-Results source).
Fix 3: Update Your BIOS Firmware
A firmware update can fix bugs and some hardware incompatibilities and generally makes the system more stable. If you can find the right BIOS version, this works even if the PC cannot reach Safe Mode, because the update is installed from the BIOS itself.
First, check your current BIOS version:
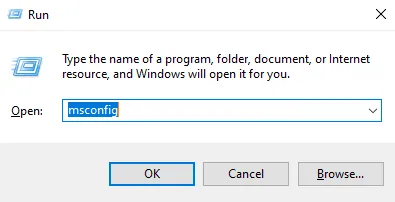
- Press Windows + R.
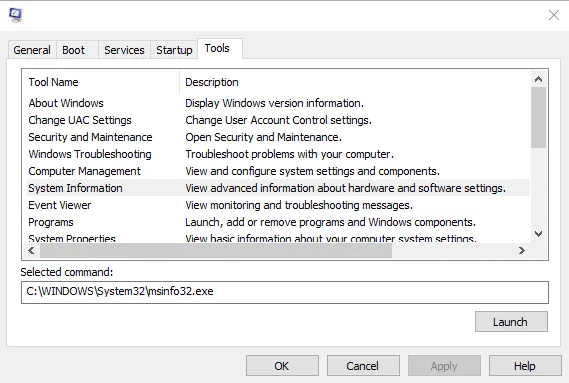
- Type msconfig and click OK to open System Configuration.
- Go to the Tools tab.
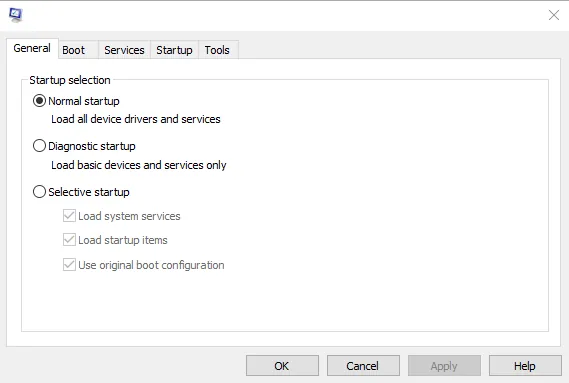
- Select System Information and click Launch.
- Note the BIOS Version/Date value.
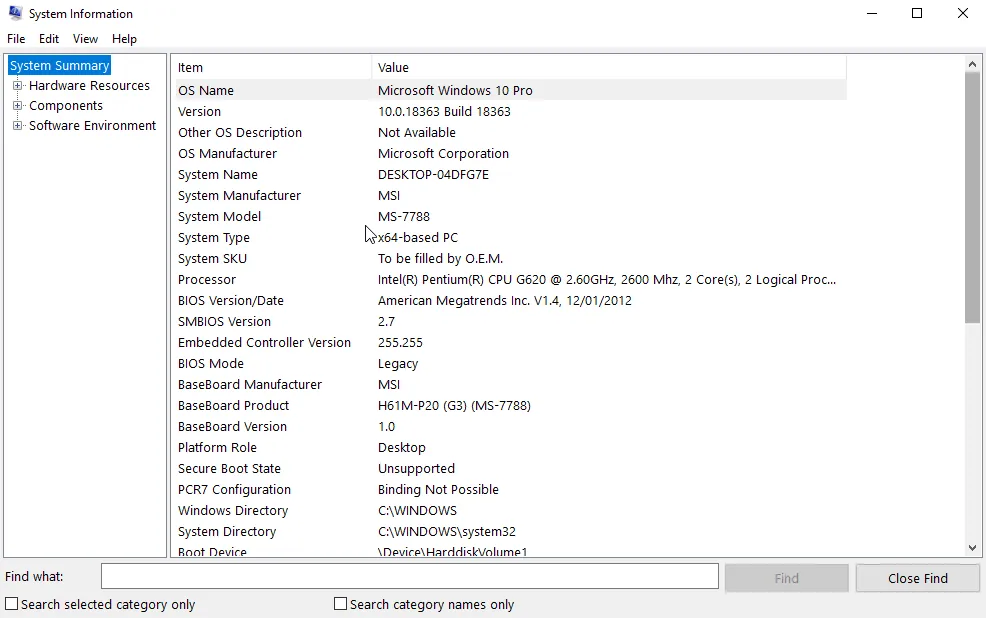
Then download the newer BIOS for your exact model from the manufacturer's website, copy it to a USB stick, enter the BIOS and run its update tool. The full process varies by manufacturer, so read their instructions carefully first: an interrupted BIOS update can damage the motherboard.
While you are in the BIOS, you can also resolve IRQ conflicts. An IRQ (interrupt request) is the signal a device uses to get the processor's attention; the number of IRQs is limited, and if two devices are assigned the same one, they can conflict. Some BIOS versions let you change the assignments manually. Similarly, if you recently added a second memory module, try removing it to rule out a memory conflict.
Fix 4: Repair System Files with SFC and DISM
Damaged system files can also trigger this error. SFC and DISM repair them, and both work from Safe Mode or from the recovery environment if Windows will not start.
- Open Command Prompt as administrator:
- In Windows or Safe Mode: type command prompt in the search box, right-click it and choose Run as administrator.
- If the PC cannot boot: go to Troubleshoot > Advanced options > Command Prompt in WinRE.
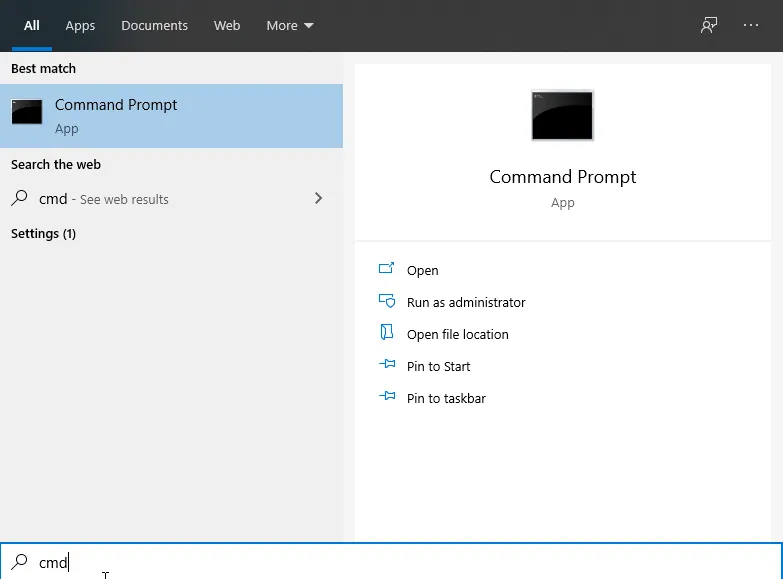
- Type
sfc /scannowand press Enter.
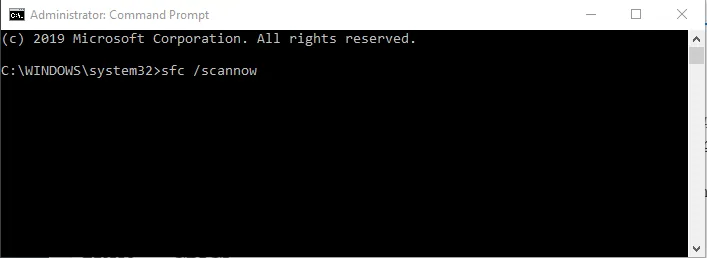
SFC replaces damaged, missing or modified system files. If the error continues afterwards, run DISM, which repairs the Windows image that SFC draws from. Run these two commands in the same window:
DISM.exe /Online /Cleanup-Image /ScanHealth
DISM.exe /Online /Cleanup-Image /RestoreHealth
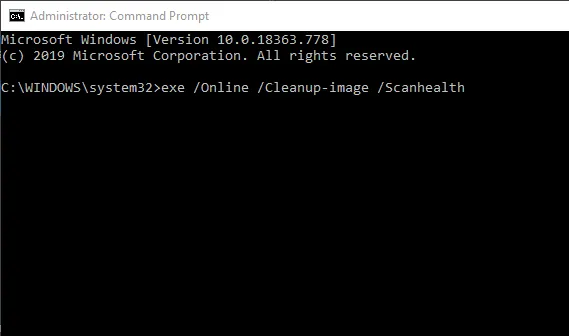
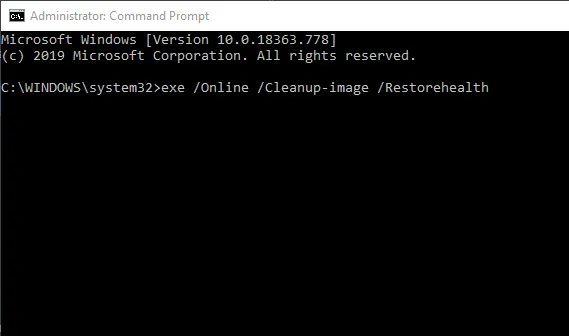
Fix 5: Check the Drive with CHKDSK
Disk errors and corrupted files can cause this blue screen and related errors such as DRIVER_IRQL_NOT_LESS_OR_EQUAL, SYSTEM_SERVICE_EXCEPTION (0x0000003B) and INACCESSIBLE_BOOT_DEVICE.
- Press Windows + X and choose Command Prompt (Admin).
- Type
chkdsk C: /f /rand press Enter.
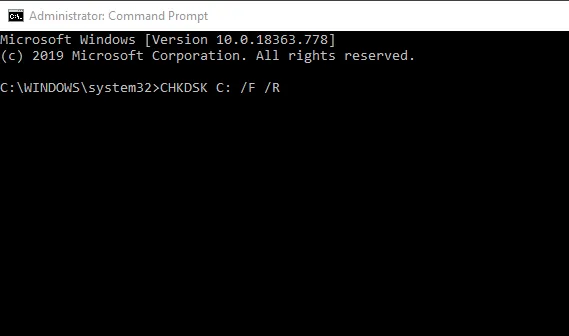
- Confirm the scan when prompted. Windows will check the drive at the next restart. Let it finish; it can take a while.
Fix 6: Uninstall Recently Installed Programs
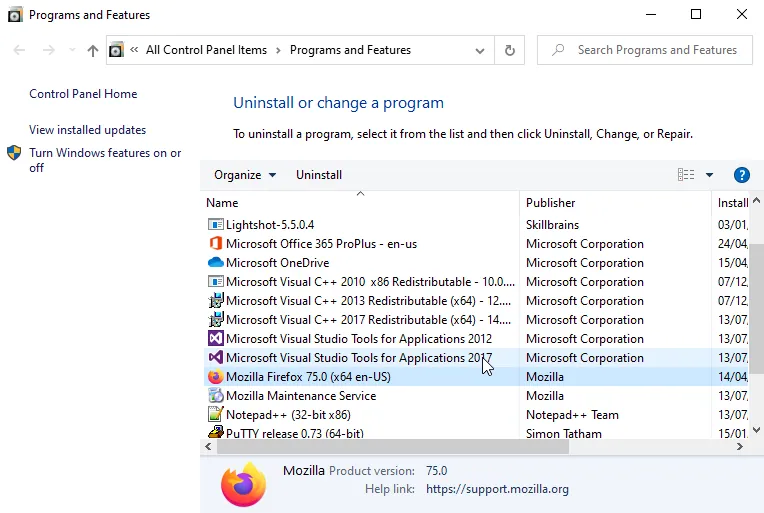
If you can get into Windows after the blue screen, uninstall any program you installed shortly before the problem started. If you are not sure which program, service or startup item is responsible, perform a clean boot (disable all non-Microsoft services and startup items in msconfig) and re-enable them one at a time to find it.
Fix 7: Use System Restore
If nothing above solves the problem, use System Restore to take your computer back to a point when it worked properly. You can start it from Windows, Safe Mode or WinRE (Troubleshoot > Advanced options > System Restore).
Fix 8: Clean Install Windows
As a last resort, a clean installation of Windows removes every faulty driver and corrupted file. Several users report that it solved the error for them. Back up your data first, either by copying it to an external drive from WinRE or by backing up the partition with a tool such as MiniTool Partition Wizard.
If you install Windows on a new drive, set it as the first boot device in the BIOS. You can then keep the old drive as a data disk, or format it and move the operating system back to it later, so that no leftover files interfere with the new installation.
Sources: partitionwizard.com, troublefixers.org, techbaby.pro, devicetricks.com