NVIDIA Control Panel Download: How to Get and Use It
Download the NVIDIA Control Panel from the Microsoft Store for DCH drivers, open it in several ways, and use its Performance settings to tune your GPU.
In this article
- Why the NVIDIA Control Panel Might Be Missing
- NVIDIA Control Panel Download
- How to Open the NVIDIA Control Panel
- The Performance Section
- System Profiles
- Device Settings: CPU
- Device Settings: Motherboard
- Device Settings: Memory
- Device Settings: GPU
- Device Settings: Power Supply
- Device Settings: Chassis
- Device Settings: Water Cooler
- Restore Defaults
- Dynamic BIOS Access
- System Information
- Example: Creating a Quiet Profile for Movies
- Overclocking Components
The NVIDIA Control Panel is where you manage everything your NVIDIA graphics card does: display resolution and refresh rate, multi-monitor setup, color settings, and per-game 3D options. If you right-click your desktop and it is not there, you are not alone. On many newer PCs it has to be downloaded separately.
Why the NVIDIA Control Panel Might Be Missing
NVIDIA ships two kinds of Windows drivers:
- Standard drivers include the NVIDIA Control Panel, so it appears as soon as the driver is installed.
- DCH drivers follow Microsoft's newer driver model, in which the control panel is a separate app. Most laptops and pre-built PCs sold since 2019 use DCH drivers.
If you want to understand the difference in more detail, MajorGeeks has a good explainer: What Are Windows DCH Drivers?
NVIDIA Control Panel Download
With a DCH driver, the NVIDIA Control Panel is distributed only through the Microsoft Store. It is free and you do not need a Microsoft account to install it.
- Open the NVIDIA Control Panel page on the Microsoft Store, or search for "NVIDIA Control Panel" in the Store app.
- Click Get (or Install) and wait for the download to finish.
- Right-click the desktop; NVIDIA Control Panel should now appear in the menu.
Avoid "NVIDIA Control Panel download" links on third-party sites. The real app is only ever offered by NVIDIA and Microsoft.
How to Open the NVIDIA Control Panel
There are three easy ways to open it:
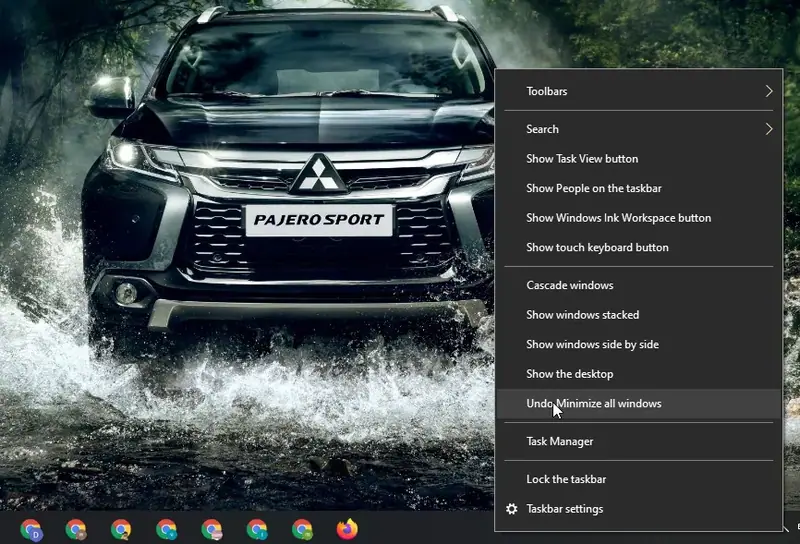
- Right-click an empty area of the desktop and choose NVIDIA Control Panel.
- Open the Windows Control Panel and double-click NVIDIA Control Panel (switch View by to small icons if you cannot see it).
- Double-click its shortcut on the desktop or in the system tray, if your PC has one.
The Performance Section
Older NVIDIA systems built on nForce motherboards included an extra Performance area in the Control Panel (installed with NVIDIA System Tools). It let you monitor and tune almost every core component in real time, not just the graphics card. Modern GeForce drivers no longer include it, but if you run one of these systems, here is what each part does.
The first time you open the Performance section, you have to accept NVIDIA's End User License Agreement by selecting Agree.
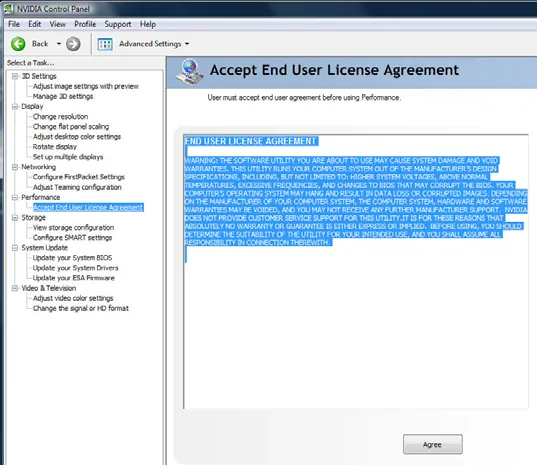
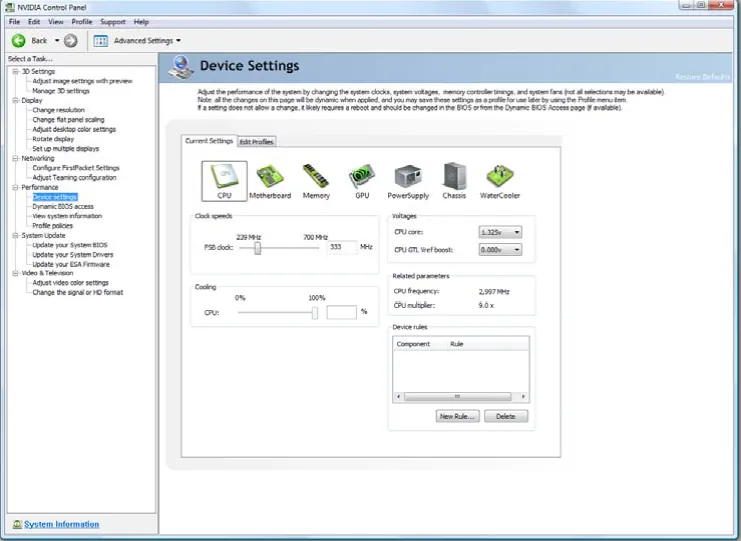
All Performance menus are listed in the left column. The Device Settings area is the heart of it: each major component has its own page where you can read live values and change settings.
System Profiles
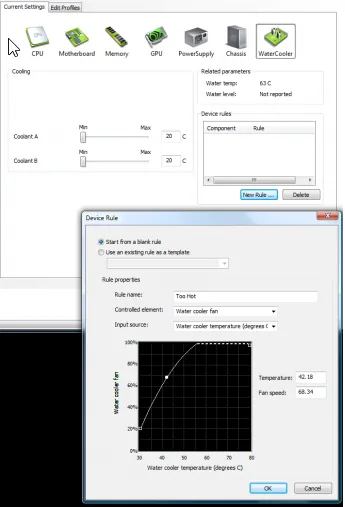
One of the most practical features is the ability to save your settings as rules and profiles. Each component page lets you create a rule, a set of conditions that changes how that component behaves. Once you have moved away from the stock configuration, you can save the whole setup, component settings and rules included, as a single profile.
That means you can match the PC's behavior to what you are doing. For gaming, load a profile that pushes the hardware for the highest frame rates. For watching a film, load one that slows the fans down for the quietest possible system.
Device Settings: CPU
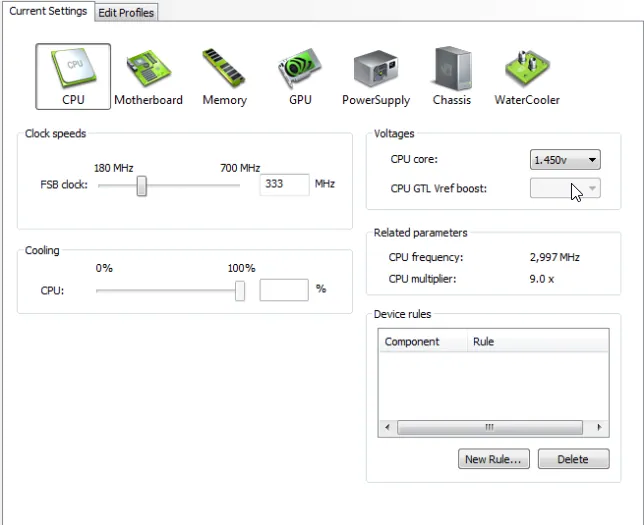
The CPU page shows the processor's key operating values. Here you can change the front-side bus (FSB) speed and raise voltages for more performance, lower the fan speed to reduce noise, and check operating parameters to confirm the system is stable. Click Apply and the new settings take effect immediately.
Device Settings: Motherboard
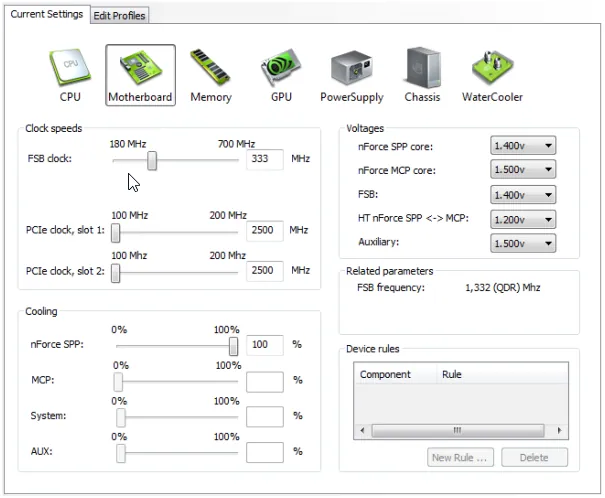
Much like the CPU page, the motherboard page controls a range of voltages, clock speeds and fan speeds, and reports critical system values.
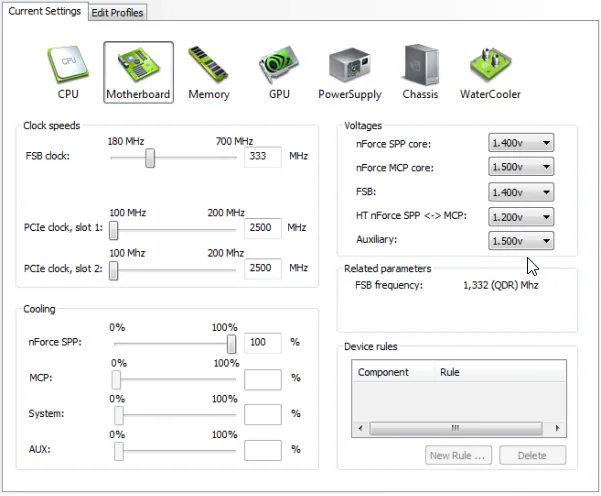
Device Settings: Memory
Every memory timing your system supports is available here, just as it would be in the BIOS, but you can change it while Windows is running. Tighten timings and raise the memory voltage where necessary to fine-tune performance, and keep an eye on the status values that update as you go.
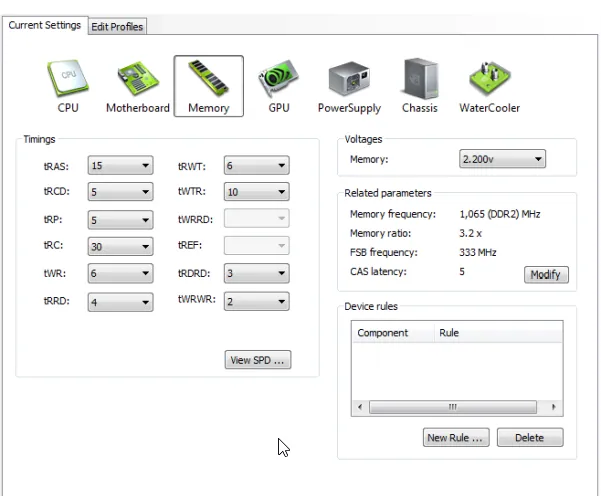
Device Settings: GPU
The graphics card page lets you change the GPU and memory clock speeds and the fan speed. On supported cards, you can also adjust the GPU core and memory voltages.
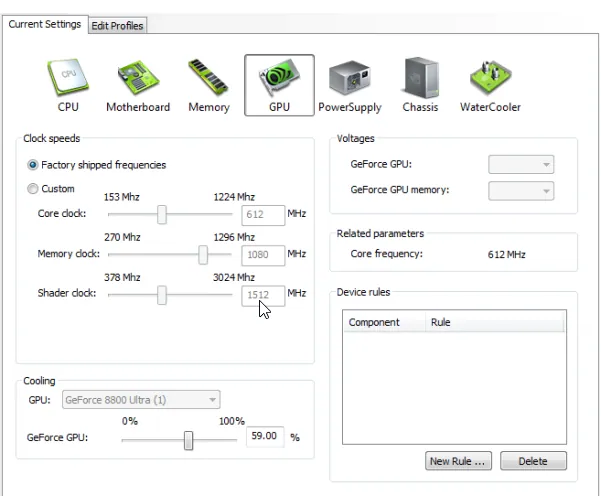
Device Settings: Power Supply
With a compatible power supply, this page shows a wide range of live data, including the voltage on each rail. Power supplies that support NVIDIA's ESA standard can also allow fan speed and voltage changes per rail.
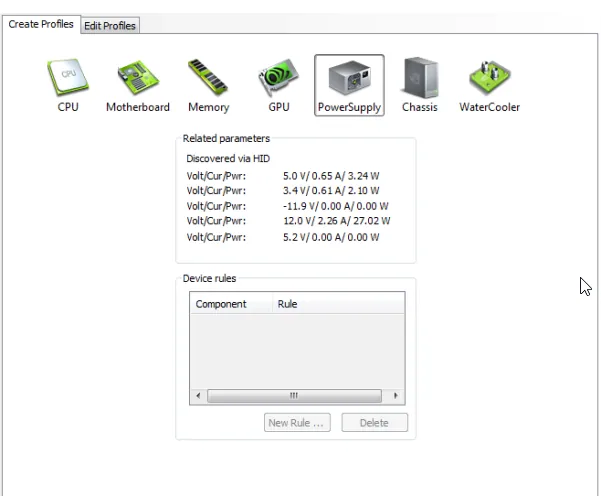
Device Settings: Chassis
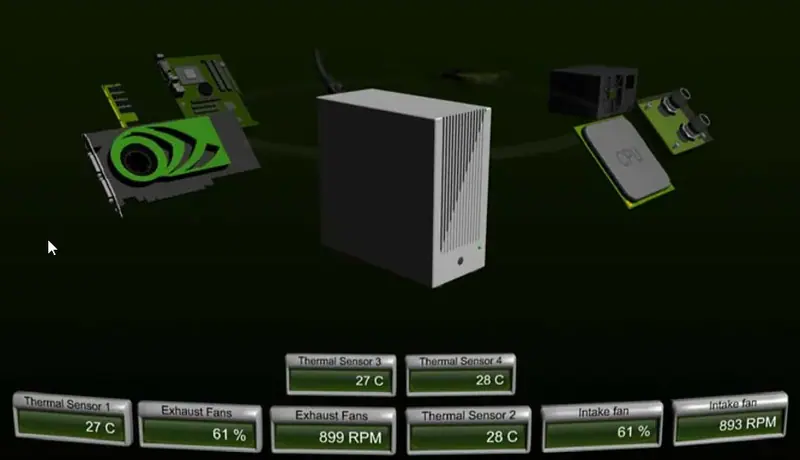
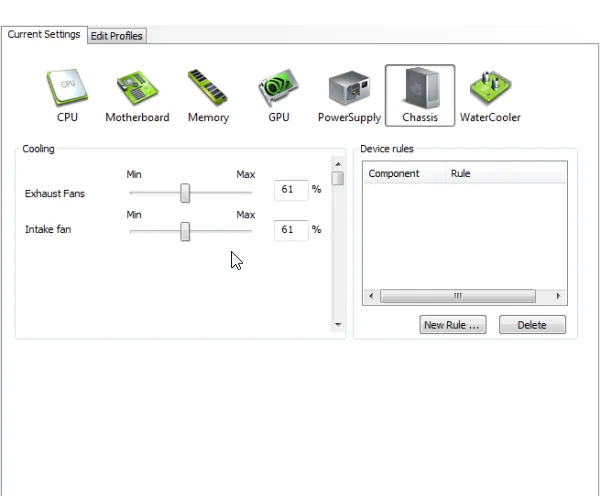
An ESA-compatible case appears here with basic fan controls. Note that the percentage on each fan slider is based on the fan's duty cycle, not its exact RPM. More advanced cases can also report temperatures for different zones inside the case.
Device Settings: Water Cooler
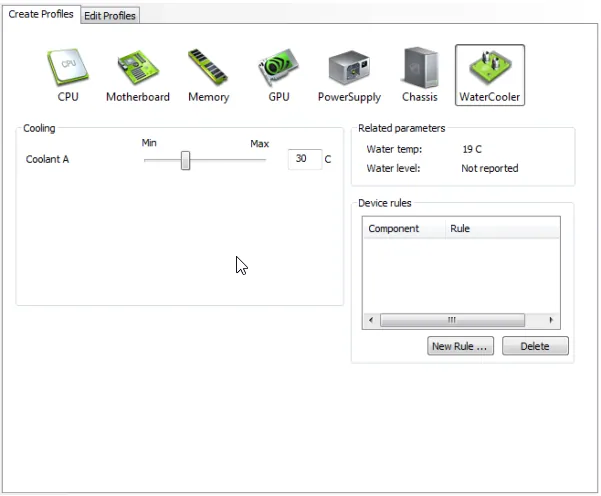
If you use a supported liquid cooler, this page shows the coolant temperature and lets you set a target. Move the slider to the left for a lower CPU temperature at the cost of more noise, or to the right for quieter operation.
Restore Defaults
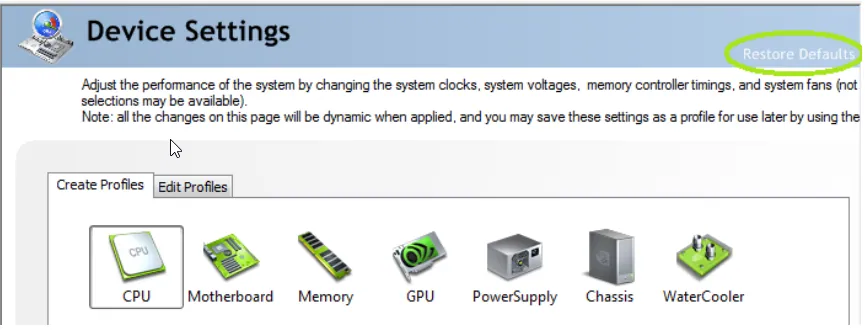
If a change causes problems, or you simply want to start again, click the restore option in the page heading. Every component goes back to its stock settings.
Dynamic BIOS Access
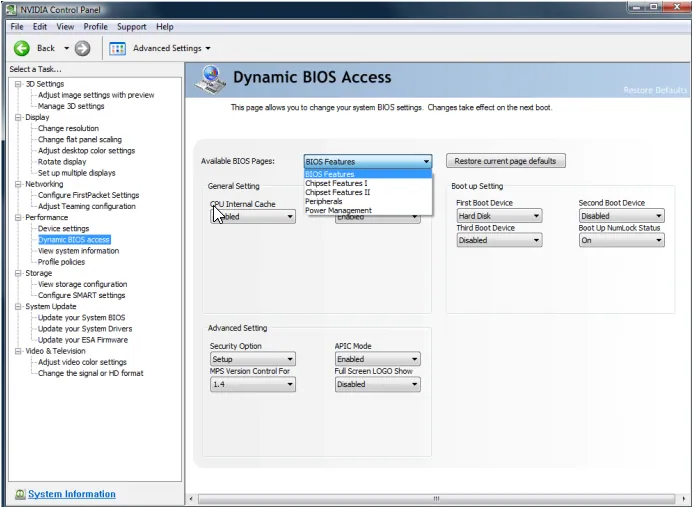
This page lets you change BIOS settings from inside Windows. Choose a page from the Available BIOS Pages list, pick a new value for any item you want to change, then click OK or Apply. Changes take effect after you restart. Because they are written to the real BIOS settings in the CMOS, they stay in place until you change them again or reset the CMOS.
System Information
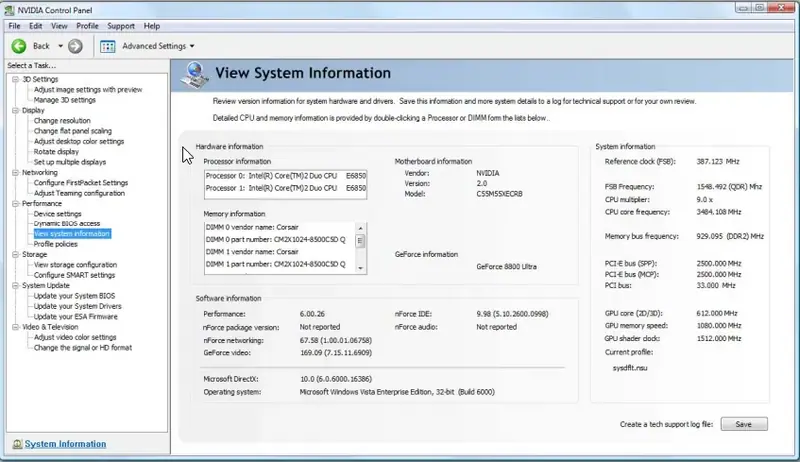
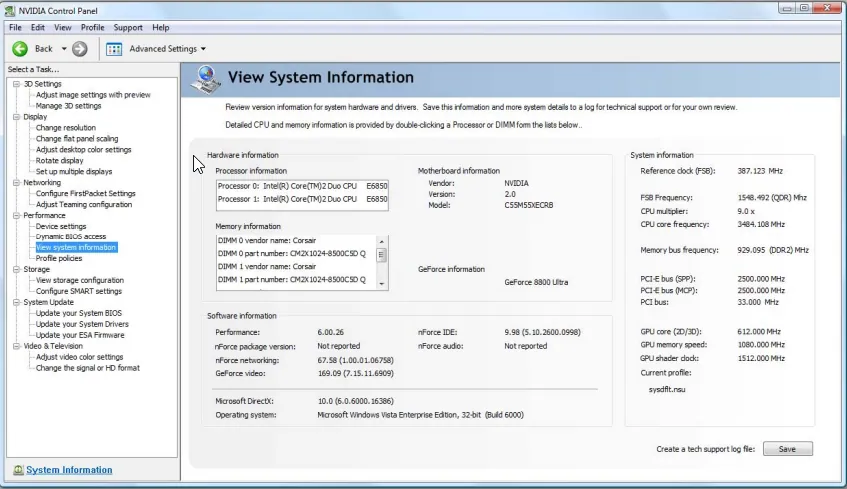
View System Information shows a detailed list of every piece of hardware in the PC. Most of it is read-only, but you can double-click items in the white panes to see more detail about that component.
Example: Creating a Quiet Profile for Movies
Custom profiles really pay off when you tune the system for one specific task. Say you want a profile for watching DVDs with as little fan noise as possible:
- Lower the chassis fan speeds. In our example, 45% still moves enough air through the case while cutting noise noticeably.
- Raise the target temperature on the water cooler, for example to 50 °C. Its fan then spins more slowly and the system gets much quieter, with no effect on stability.
- When everything is set, open Profile in the top menu and click Save.
- Give the profile a name such as Watch_DVD.
Next time, open Profile > Load and choose it to switch to quiet mode in one click.
Overclocking Components
The same tools make overclocking straightforward. Every slider starts at the component's stock value. Raise the frequency, voltage or fan speed sliders to squeeze out more performance. Nothing changes until you click Apply at the bottom of the page.
Increase values in small steps and test stability after each change. Higher clocks and voltages produce more heat, and pushing too far can crash the system or shorten the life of your hardware.