Reboot and Select Proper Boot Device: How to Fix the Error
Seeing "Reboot and Select Proper Boot Device" at startup? Check the boot order, Legacy and UEFI settings, the CMOS battery and your drive with these fixes.
In this article
- What Does "Reboot and Select Proper Boot Device" Mean?
- How to Fix "Reboot and Select Proper Boot Device"
- 1. Check the Drive's Power and Data Cables
- 2. Clean and Reseat the RAM
- 3. Check the Boot Order
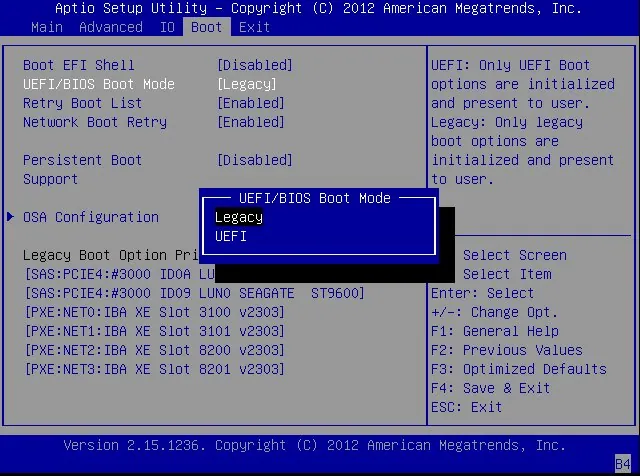
- 4. Enable or Disable Legacy Boot
- 5. Check Whether the Hard Drive Is Failing
- 6. Mark the Windows Partition as Active with DiskPart
- 7. Replace the CMOS Battery
- 8. Reinstall Windows
You switch on your PC and, instead of the Windows logo, you see a black screen with white text: "Reboot and Select proper Boot device or Insert Boot Media in selected Boot device and press a key." Pressing a key does nothing, restarting brings the same message back, and Windows will not load no matter how many times you try.
The error has affected every version of Windows from XP to 8.1 and still appears on Windows 10 PCs. It can come out of nowhere, but it usually has one of a handful of causes, and most of them can be fixed.
What Does "Reboot and Select Proper Boot Device" Mean?
The message comes from your computer's BIOS (or UEFI firmware), not from Windows. It means the firmware could not find a drive it can start the computer from. In other words, the chip on the motherboard does not recognize the drive where Windows is installed, so it has nothing to load. At this stage the PC is effectively frozen and the keyboard may stop responding.
The most common causes are:
- A loose or faulty cable. SATA and power cables can work loose over time, especially after a PC has been moved. The drive then disappears from the BIOS.
- A failing hard drive or SSD.
- The wrong boot order. The BIOS is trying to start from a USB stick, DVD or second drive before the Windows drive.
- Legacy/UEFI boot mode mismatch.
- A corrupted boot partition or operating system, for example after a virus, a failed Windows update or a BIOS update.
- A weak CMOS battery that lets the BIOS forget its settings.
Work through the fixes below in order; the first ones are the quickest.
How to Fix "Reboot and Select Proper Boot Device"
1. Check the Drive's Power and Data Cables
If the drive's power or SATA cable is damaged or not seated properly, the BIOS cannot detect the drive. Shut down the PC, unplug it, open the case and reseat both cables at the drive and the motherboard. If you have a spare cable, swap it in. If you can test the cable in another computer and the drive is not detected there either, the cable is faulty and should be replaced.
2. Clean and Reseat the RAM
Dust and poor contact on the memory modules can also stop the PC from starting properly. Remove the RAM sticks, gently wipe the contacts with a soft, dry cloth, clean the dust out of the slots and reinsert them firmly until the clips lock. Then try starting the PC again.
3. Check the Boot Order
If a USB stick, memory card or DVD is connected, the BIOS may be trying to start from it. Remove any external media first. Then enter the BIOS/UEFI setup (usually by pressing Del, F2, F10 or Esc during startup; check your motherboard or laptop manual), open the Boot tab and put your Windows drive (HDD or SSD) at the top of the list. Save the changes and restart.
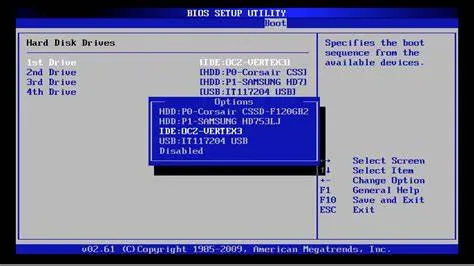
If your Windows drive does not appear in the BIOS at all, go back to step 1. The BIOS cannot see the drive, which points to a cable or hardware problem.
4. Enable or Disable Legacy Boot
Computers that came with Windows 8 or later use UEFI firmware instead of the classic BIOS. UEFI has a Legacy Boot (or CSM) option, and if it does not match the way Windows was installed, the system cannot find a bootable drive.
- Restart the computer and enter the UEFI setup. The key depends on the manufacturer; see your manual.
- Look for Legacy Boot, Legacy Support or CSM on the Boot or Advanced tab.
- If it is enabled, disable it. If it is disabled, enable it.
- Save the changes, restart, and see whether Windows loads.
5. Check Whether the Hard Drive Is Failing
A dying drive is a common cause. One way to test it is with Easy Recovery Essentials, a bootable repair tool from NeoSmart:
- On another computer, download the Easy Recovery Essentials ISO and burn it to a CD, DVD or USB stick with any free burning tool.
- Insert the media into the affected computer, restart it and boot from the media.
- Click Automated Repair, then Continue.
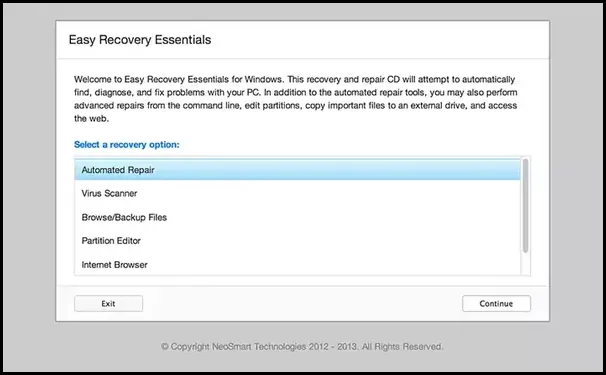
Image source: neosmart.com 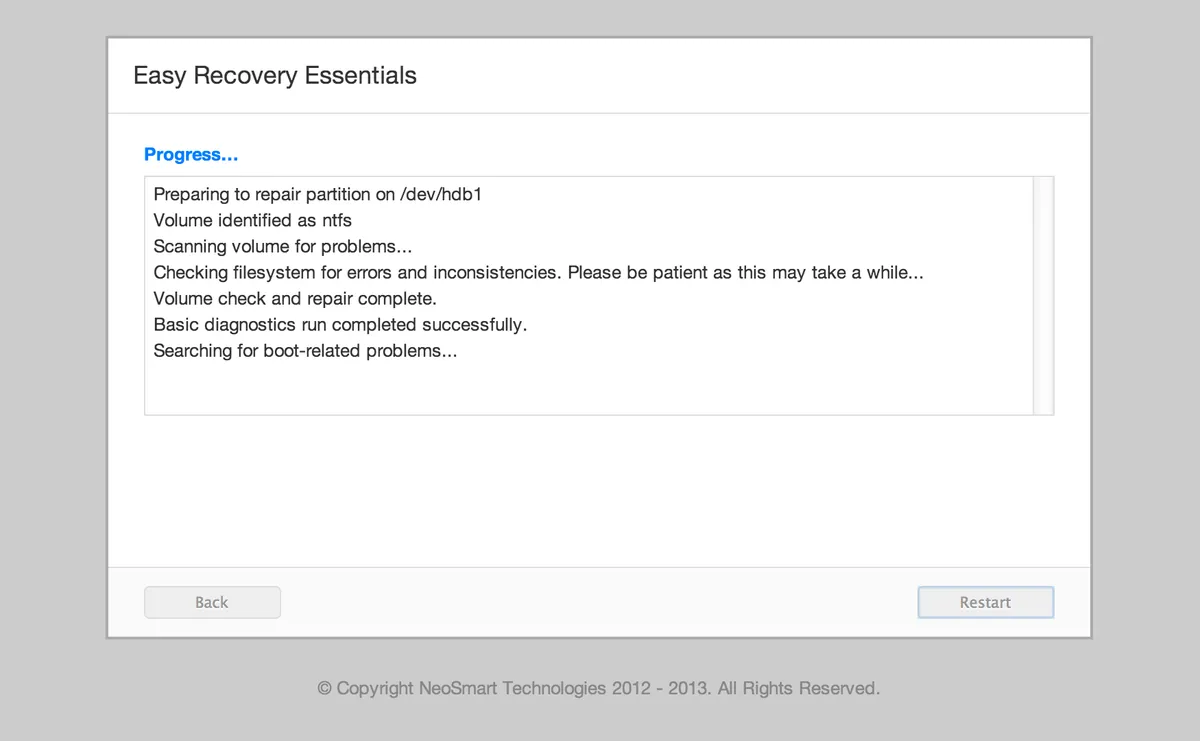
Image source: neosmart.com - Wait for the repair to finish. The tool reports whether your hard drive or RAM has failed or is failing.
If the drive is failing, replace it and install a fresh copy of Windows. Try to copy your important files off the old drive first, while it still works.
6. Mark the Windows Partition as Active with DiskPart
On older BIOS (MBR) systems, the error also appears if the Windows partition is no longer marked as active, the flag that tells the BIOS where to boot from. You can fix this from the Windows recovery environment:
- Insert a Windows installation or recovery USB/DVD into the affected computer, restart it and boot from the media.
- Choose Repair your computer. On Windows 7 (and XP and Vista) this opens System Recovery Options.
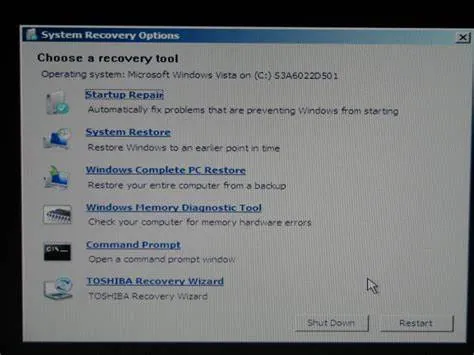
Image source: support.toshiba.ca - On Windows 8, 10 and 11, click Troubleshoot, then Advanced options.
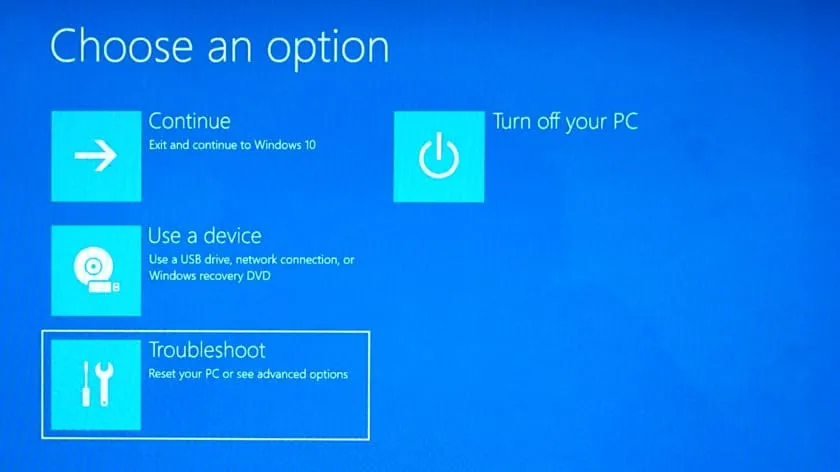
Image source: Android Authority 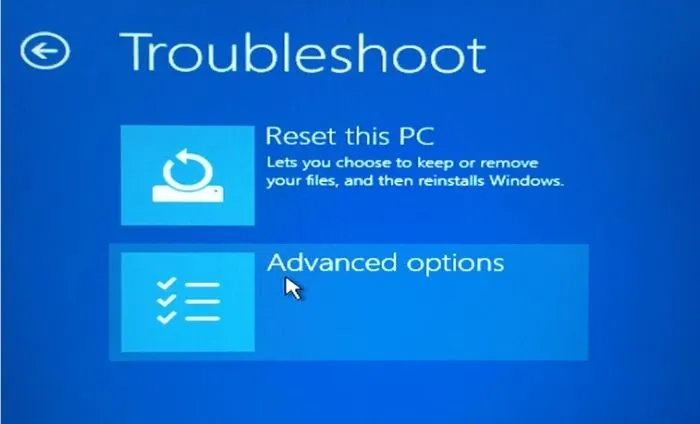
Image source: Into Windows 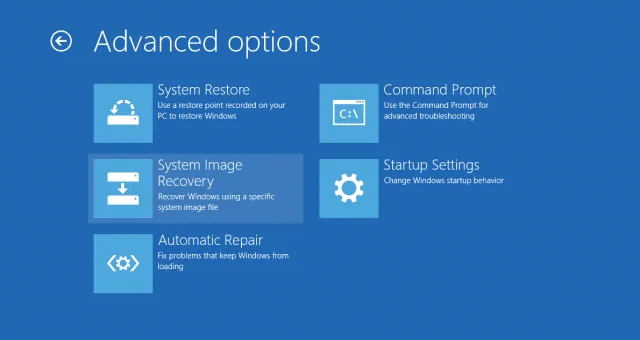
Image source: Ars Technica - Click Command Prompt and enter these commands one at a time, pressing Enter after each:
diskpart
list disk
select disk 0
list partition
select partition 1
active
exit
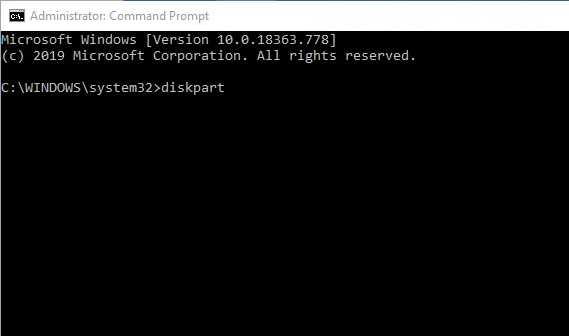
Replace 0 with the number of the disk where Windows is installed (shown by list disk) and 1 with the number of the Windows or System Reserved partition (shown by list partition). On UEFI systems with GPT disks the active flag does not apply; use Startup Repair from the same Advanced options menu instead.
If you do not have Windows installation media, the Easy Recovery Essentials disc from step 5 also offers a Launch Command Line option where you can run the same commands.
7. Replace the CMOS Battery
The CMOS battery is the small coin cell on the motherboard that keeps the BIOS settings, including the boot order, when the PC is unplugged. When it runs down, the BIOS can lose those settings and stop finding the boot drive.
- Shut down the PC and unplug it.
- Open the case and remove the CMOS battery (usually a CR2032).
- Hold the power button for at least 10 seconds to drain any remaining charge.
- Insert a new battery, close the case and start the PC. Check the boot settings in the BIOS, because they will have been reset to defaults.
8. Reinstall Windows
If none of the fixes above worked, the drive is healthy and there are no other hardware faults, reinstalling Windows is the definitive solution. Use a Windows installation USB, and if possible rescue your files first by booting from recovery media and copying them to an external drive.
Sources: minitool.com, auslogics.com, appuals.com, drivereasy.com