Kernel Security Check Failure on Windows 10: How to Fix It
Fix the Kernel Security Check Failure blue screen on Windows 10 and 8: find the cause, update drivers, run SFC and CHKDSK, test your memory and more.
In this article
- What Causes Kernel Security Check Failure?
- How to Fix Kernel Security Check Failure
- Undo Recent Changes
- Update Your Drivers
- Consider a System Repair Tool
- Disconnect Peripherals and Check Connections
- Start the Computer in Safe Mode
- Uninstall Recently Installed Programs
- Stop Overclocking
- Install Windows Updates
- Update or Uninstall Third-Party Antivirus Software
- Scan for Corrupted System Files
- Check the Disk with File Explorer
- Test Your RAM with Windows Memory Diagnostic
- Find and Update Faulty Drivers with Driver Verifier
- Use System Restore
- Reset Windows 10
- Clean Install Windows from a USB Drive
- Roll Back to a Previous Version of Windows
- Update Your BIOS/UEFI Firmware
- Scan the Hard Drive with CHKDSK
- Kernel Security Check Failure FAQ
- What causes Kernel Security Check Failure?
- What does the Kernel Security Check Failure stop code mean?
- What does 0xc000021a mean?
Nobody likes seeing the Blue Screen of Death. One of the more serious versions shows the stop code KERNEL_SECURITY_CHECK_FAILURE. During startup and while it runs, Windows checks its most important internal data structures for damage. When one of those checks finds corruption, Windows stops immediately with this error rather than risk your data.
The good news is that the cause is usually software, and there is a long list of fixes you can try. This guide covers all of them, from the quickest to the most thorough.
What Causes Kernel Security Check Failure?
The error is usually triggered by one of these:
- Memory (RAM) problems
- Outdated or incompatible drivers
- Virus or malware infections
- Damaged Windows system files
- Security software that conflicts with Windows
- A damaged or failing hard drive
By far the most common cause is an incompatible driver, especially on PCs upgraded from an older version of Windows to Windows 8 or 10. A driver that worked perfectly on the old system may not work properly on the new one, and Windows responds with this blue screen.
How to Fix Kernel Security Check Failure
Undo Recent Changes
Think about what changed just before the blue screens started. If you added new hardware or installed new software, remove it and see whether the problem goes away.
Update Your Drivers
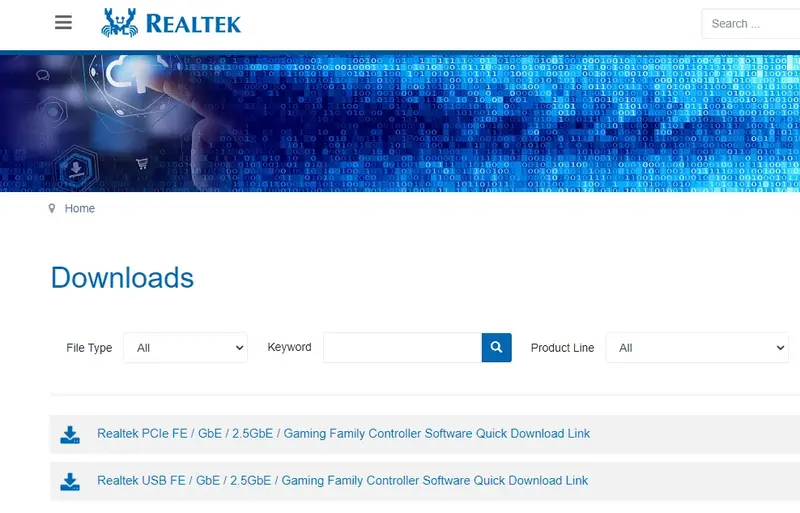
Because incompatible drivers are the most likely cause, make sure every device has the correct, up-to-date driver. Visit the website of each hardware manufacturer (graphics card, network adapter, chipset, audio and so on), find the latest driver for your model, and install it. Only choose drivers that are made for your version of Windows 10.
Consider a System Repair Tool
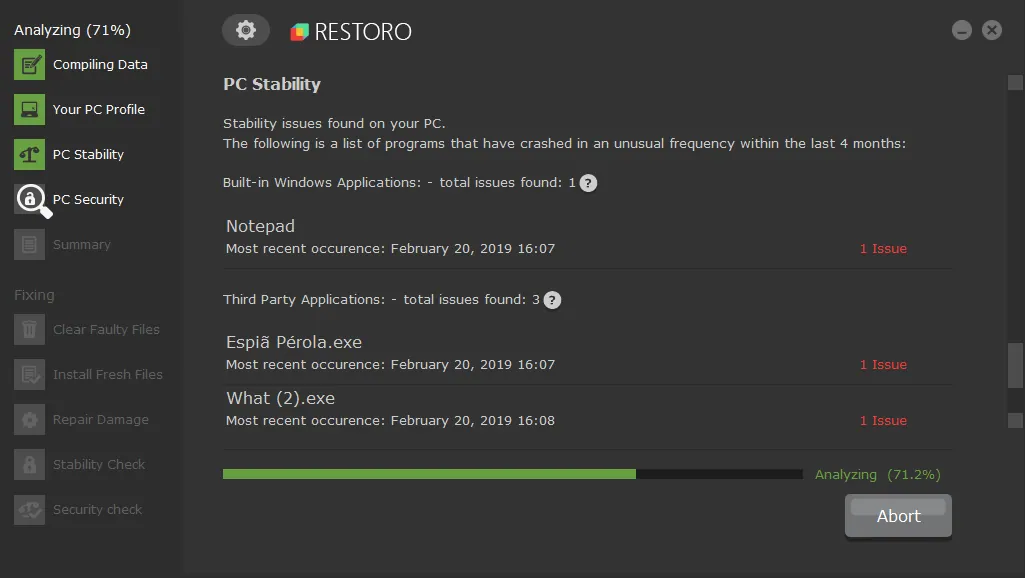
Outdated drivers, corrupted Windows files and registry problems can all lead to kernel errors. Some all-in-one repair utilities, Restoro among them, scan for these problems together, check for outdated drivers and compare your system files against known-good copies. They can save time, but most of them are paid and the free built-in Windows tools covered later in this guide (SFC, DISM and CHKDSK) do much of the same work. If you try one, download it only from the developer's official site.
Disconnect Peripherals and Check Connections
When Windows 10 starts, it connects to every device attached to the PC. If one of those connections is loose or a device is not responding properly, it can trigger the Kernel Security Check Failure error.
- Shut down the computer. If it is frozen, hold the power button for about 30 seconds to force it off.
- Remove everything except your monitor, keyboard and mouse: SD cards, USB flash drives, headphones, external speakers, game controllers, CDs and DVDs. To eject a disc while the PC is off, push a straightened paper clip into the small manual eject hole on the front of the drive.
- Check that the cables between the monitor, mouse, keyboard and computer are firmly connected at both ends, and that the monitor's power cable is secure. Replace any cable that looks worn, and put fresh batteries in a wireless mouse.
- If you are comfortable working inside a PC, make sure the RAM modules and the hard drive are properly seated. If not, skip this step: opening the computer can cause more harm than good, and it may void your warranty.
- Restart the computer. If the error is still there, move on to the next fix.
Start the Computer in Safe Mode
Most of the remaining fixes are easiest in Safe Mode, which loads Windows with only essential drivers. Sometimes you can reach the normal startup screen and enter Safe Mode before the blue screen appears again. If not, a Windows USB recovery drive is the safest way in. If you have no other option, you can force Windows into its repair mode as described below. Use this method only when you cannot reach Safe Mode any other way.
- Turn on the computer and press the power button to shut it down before Windows finishes loading. Do this three times.
- On the next start, Windows shows Preparing Automatic Repair and tries to fix the problem itself. If it succeeds, you are done.
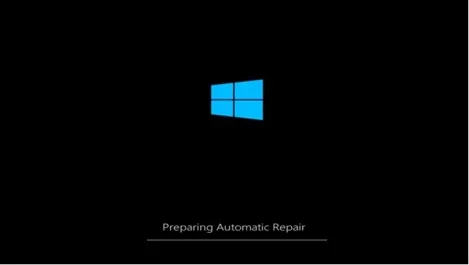
Image source: msncustomerservice.com - If the repair fails, you get two options: Restart or Advanced options. Choose Advanced options.
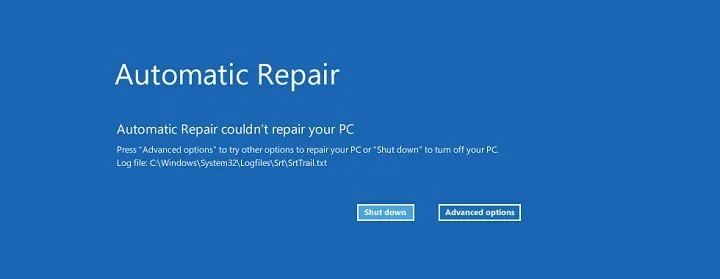
Image source: fixwindowserrors.biz - Go to Troubleshoot > Advanced options and click Startup Settings.
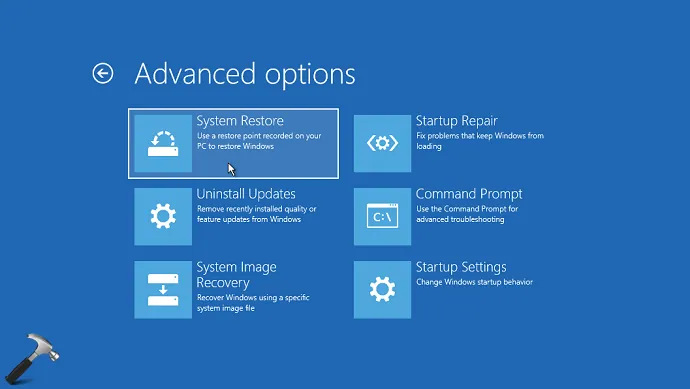
Image source: kapilarya.com - Click Restart. When the list of options appears, choose Enable Safe Mode. With this method, the next normal restart takes you back to regular Windows.
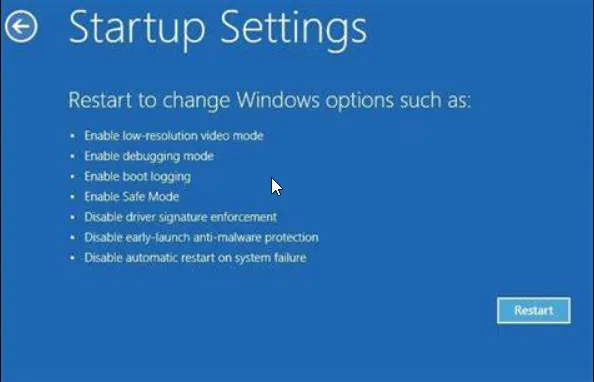
Image source: troubleshooter.xyz
Create a USB Recovery Drive
Once you are in Safe Mode, it is worth creating a bootable Windows USB drive so you can get back into recovery mode easily. It is easiest to do this on another computer; if you have one, skip to the step about finding your Windows version. If not, you can try from the affected PC in Safe Mode with Networking:
- Press Windows + R, type msconfig and press Enter.
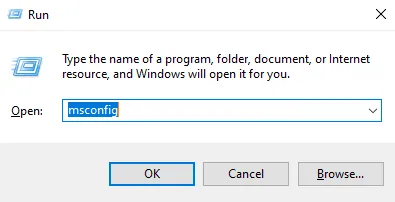
- On the Boot tab, under Boot options, tick Safe boot and select Network. Click Apply and OK, then choose Restart.
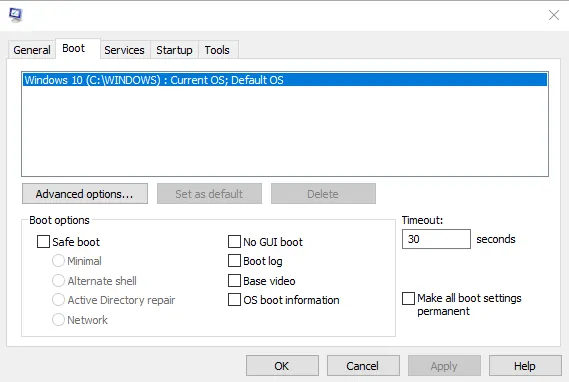
- If the blue screen appears even in Safe Mode with Networking, create the USB drive on another computer. Next time you are in Safe Mode, open msconfig again, uncheck Safe boot, click Apply and OK, and choose Exit without restart, so the PC no longer starts in Safe Mode every time.
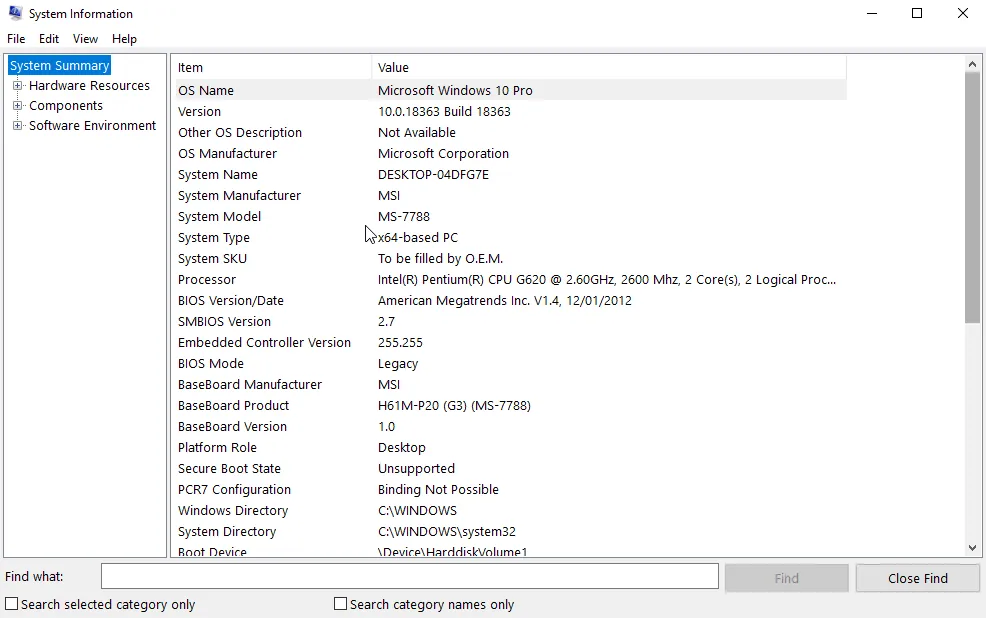
- Find out which version of Windows you have and whether it is 32-bit or 64-bit: type System Information in the Start menu and open it. Also check your Windows language under Region and language. The USB drive must match the version and language you already have.
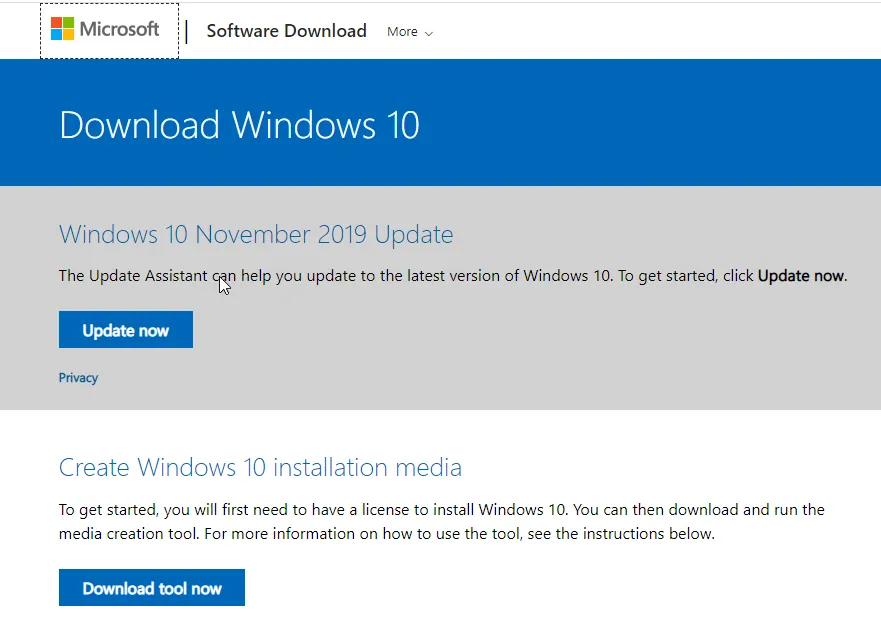
- Go to Microsoft's Windows 10 download page, click Download tool now and run the Media Creation Tool as administrator.
- Read and accept the license terms.
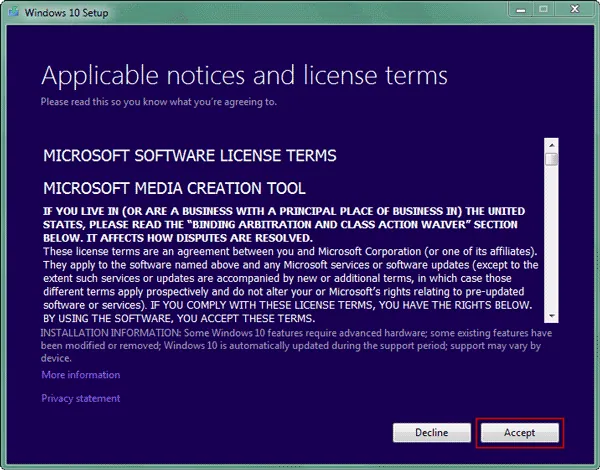
Image source: isunshare.com - Plug in an empty USB flash drive of at least 8 GB (16 GB is safer), choose Create installation media (USB flash drive, DVD, or ISO file) for another PC and click Next.
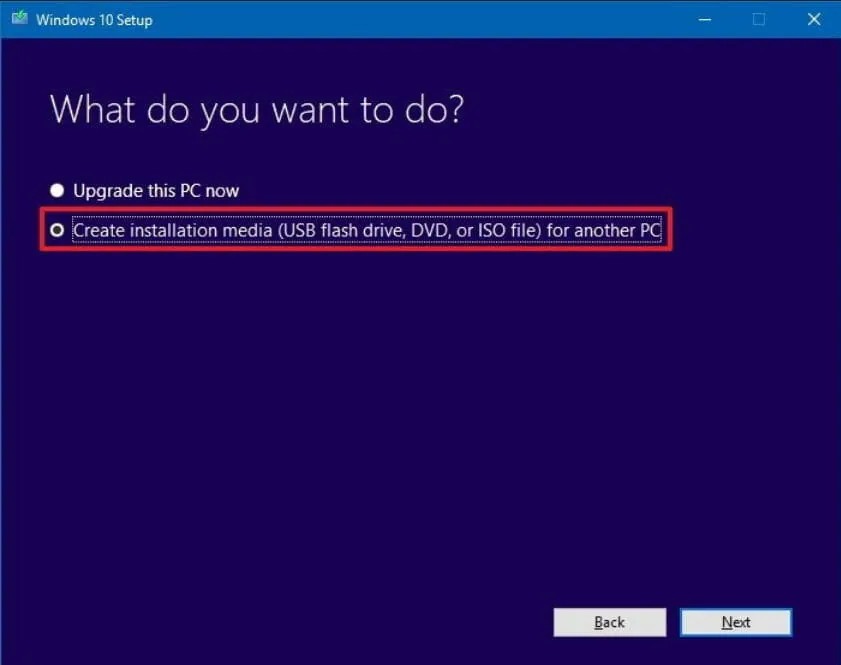
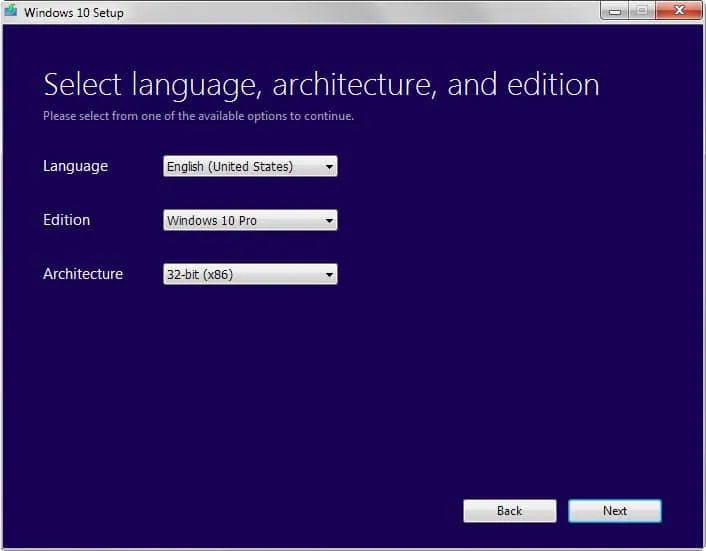
Image source: backup-utility.com - Select the language, edition and architecture that match your current Windows installation, then click Next.
- Choose USB flash drive and click Next.
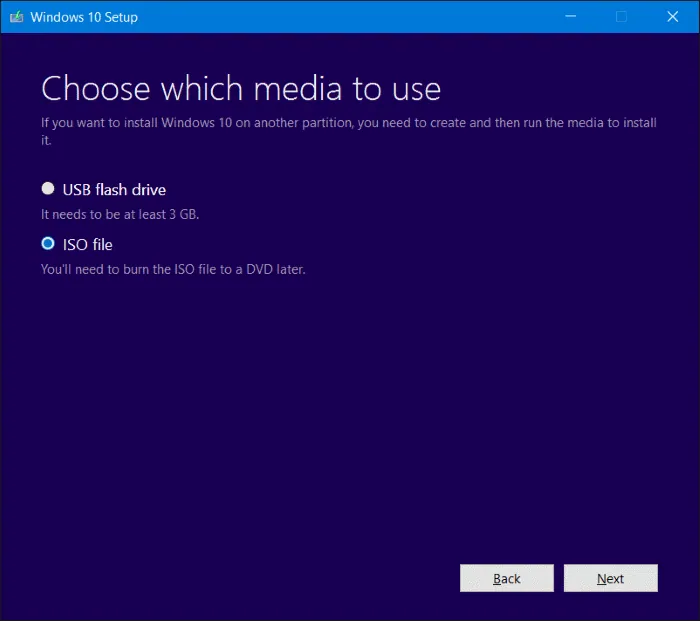
Image source: Into Windows - Select your flash drive. With only one drive plugged in, there should be just one option.
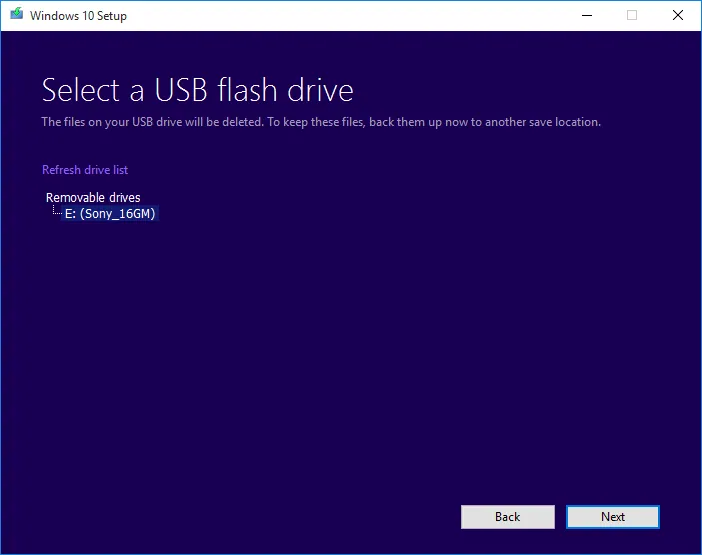
Image source: Media Creation Tool - Windows 10 now downloads to the flash drive and is verified afterwards. Depending on your connection, this can take a long time. When you see that the drive is ready, click Finish.
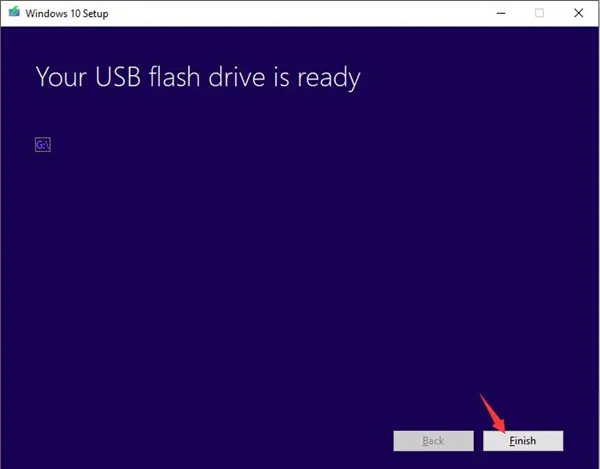
Image source: windows10skill.com
Back Up Your Files
Before making bigger changes, back up your files. Insert a second USB drive (or an external hard drive) that is large enough, then:
- Type Control Panel in the Start menu and open it.
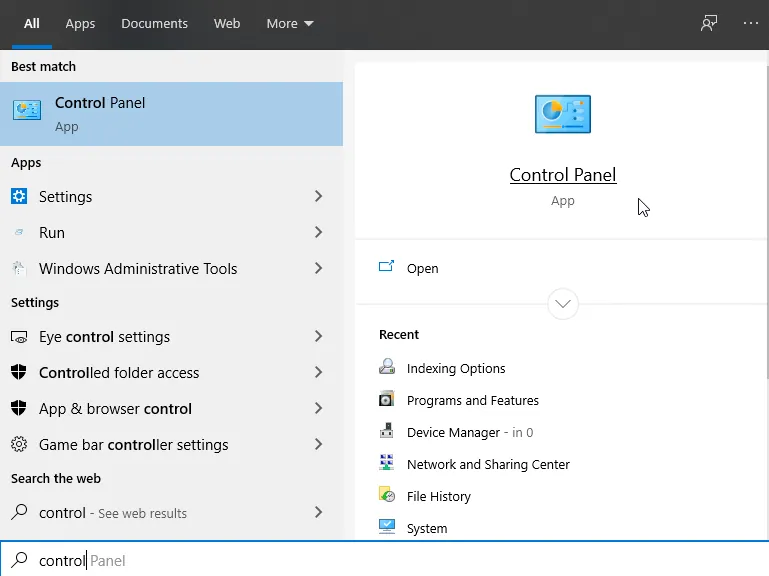
- Under System and Security (in Category view), click Backup and Restore (Windows 7).
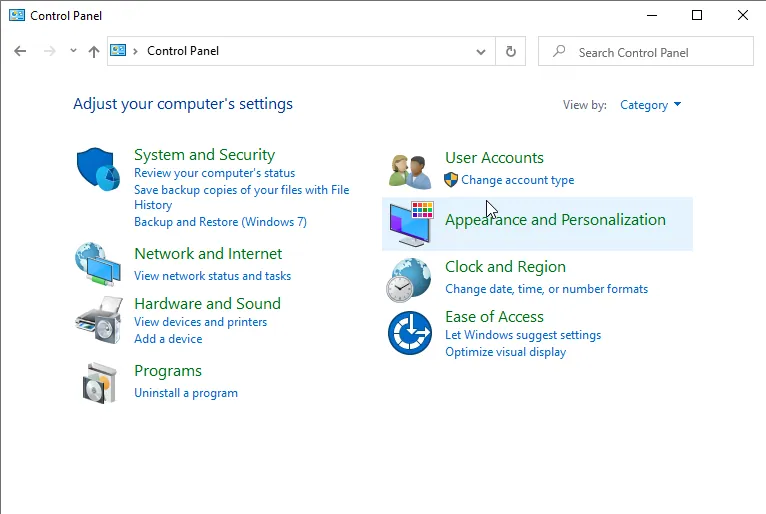
- Click Create a system image on the left.
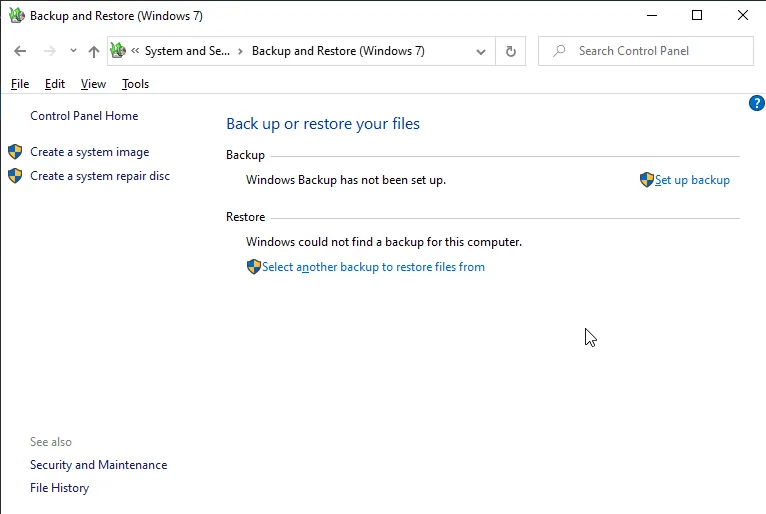
- Choose On a hard disk, select the external drive, click Next and then Start backup. The drive must be plugged in before you reach this screen. The backup can take a while.
Uninstall Recently Installed Programs
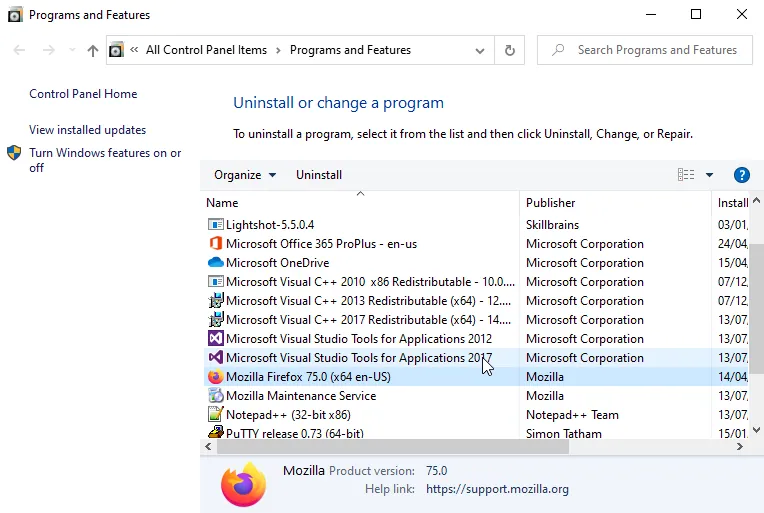
Once you are in Safe Mode, the first repair step is to remove any apps you installed recently. A new program may be incompatible with your system and causing the blue screen. It is also a good moment to remove software you no longer use.
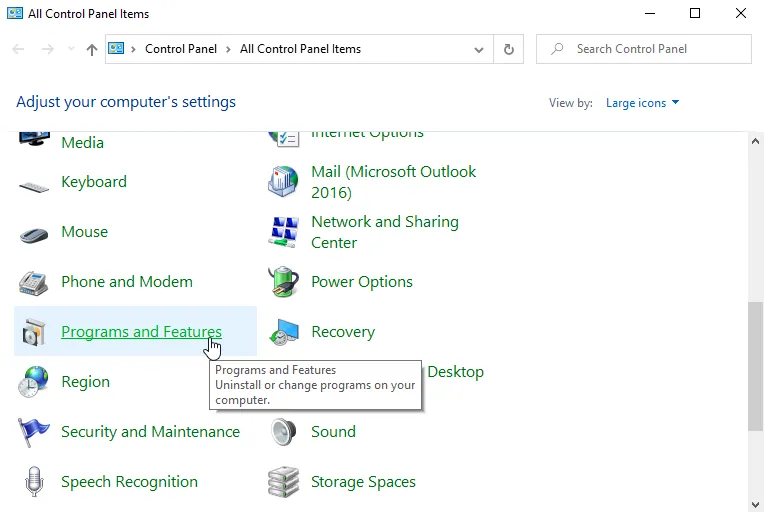
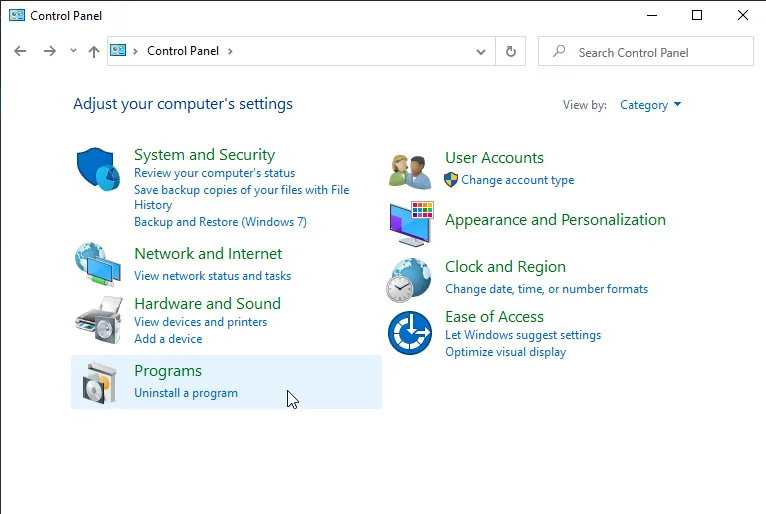
- Type Control Panel in the Start menu search box and open it.
- Click Uninstall a program.
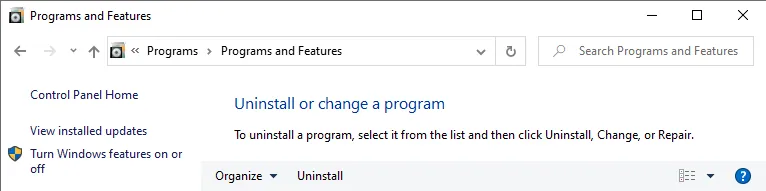
- Select the program you want to remove, click Uninstall/Change and confirm. Repeat for every program you want to remove.
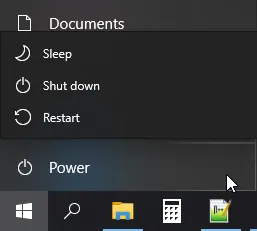
- Restart the computer and check whether the blue screen is gone. If not, return to Safe Mode and continue with the fixes below.
Stop Overclocking
If you have never overclocked your PC, skip this step. Relatively few processors handle overclocking well, especially without upgraded cooling. If you installed overclocking software, uninstall it as described above. If you changed clock speeds or voltages in the BIOS, go back in and restore the factory defaults. An overclocked system that is unstable can produce exactly this blue screen, and in the worst case, the heat can damage the processor.
Install Windows Updates
Keeping Windows 10 up to date is essential for stability. A faulty update can sometimes cause this error, and a later update often fixes it. To update manually:
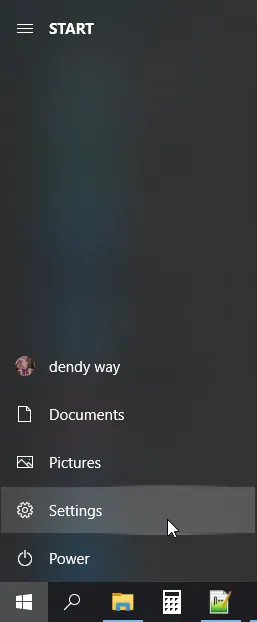
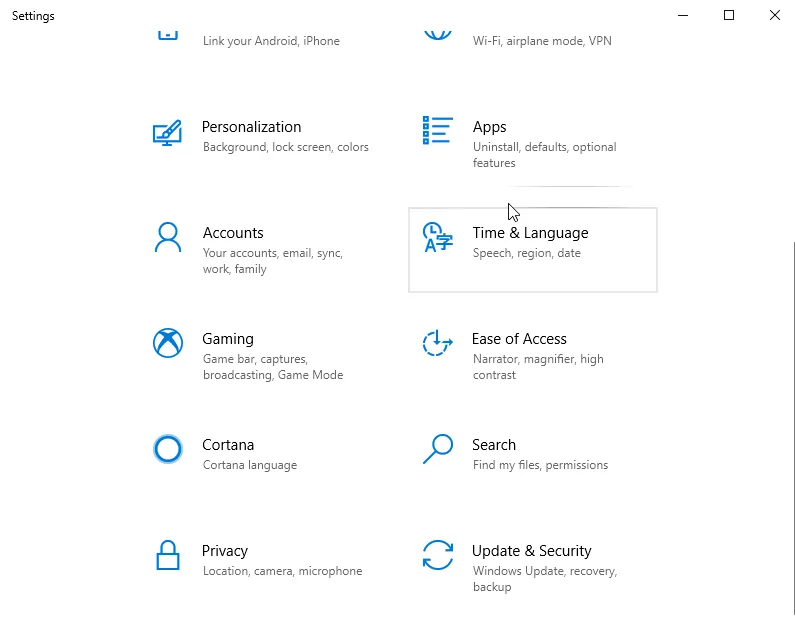
- Click the Settings icon in the Start menu.
- Choose Update & Security.
- Select Windows Update and click Check for updates.
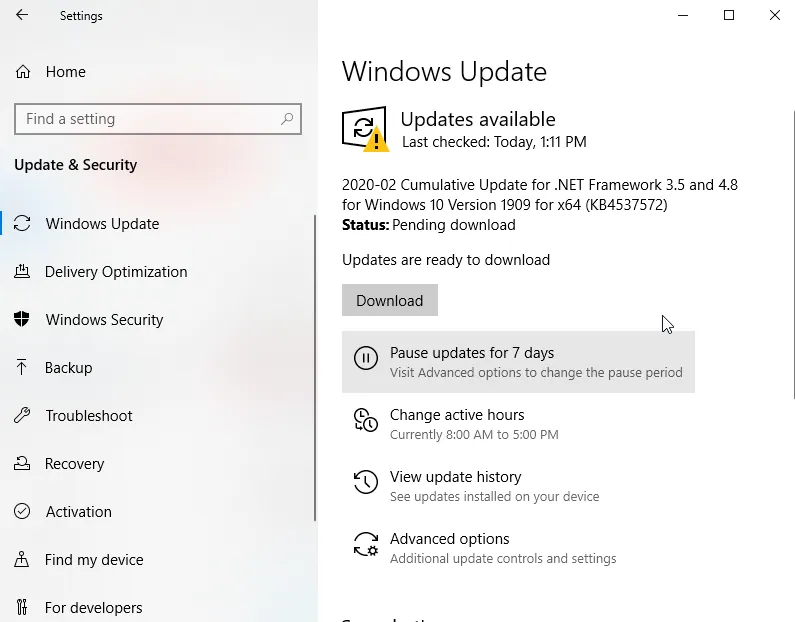
- If updates are installed, restart the computer so they take effect: open the Start menu, click the power icon and choose Restart.
Update or Uninstall Third-Party Antivirus Software
Windows 10 includes Microsoft Defender. Running a third-party antivirus alongside it, or an antivirus that hooks too deeply into Windows, can easily trigger Kernel Security Check Failure. Every antivirus is different, so check its website for exact instructions. The general steps are below. You need Safe Mode with Networking to download updates.
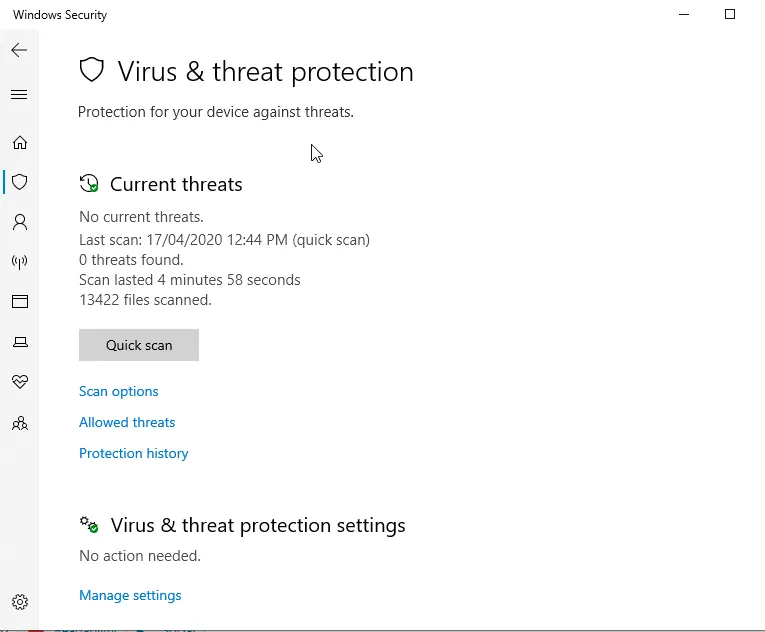
- Open your antivirus program and find its Update option. It is usually on the main screen, a General tab or under Settings. Run the update.
- Restart the computer and run a full scan. Remove anything it finds, restart again, and check whether the blue screen is gone.
- If not, uninstall the antivirus. Press Windows + X and choose Settings.
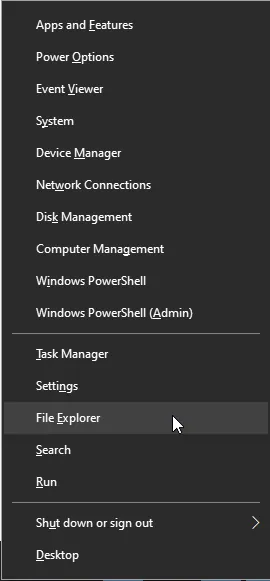
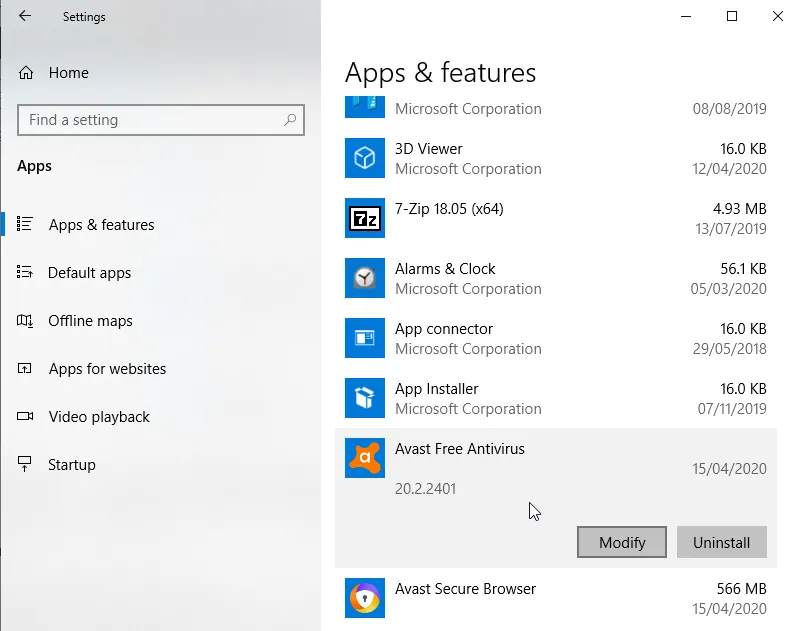
- Click Apps, find your antivirus under Apps & features, select it and click Uninstall.
- Restart the computer.
If the error disappears, you can try reinstalling the latest version of your antivirus. If the blue screen comes back, remove it again and choose a different product or stay with Microsoft Defender. Either way, always keep exactly one antivirus program running.
Scan for Corrupted System Files
Windows system files can become corrupted over time, and corruption is one of the classic triggers of this error. Windows 10 includes tools that find and repair it. Run them in Safe Mode.
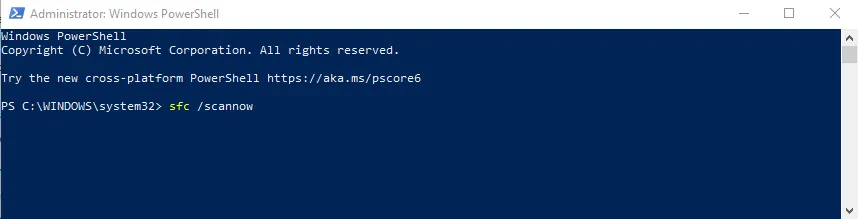
- Press Windows + X and choose Windows PowerShell (Admin).
- Type
sfc /scannowand press Enter.
- When the scan finishes (it may take a while), type
Repair-WindowsImage -Online -RestoreHealthand press Enter. This repair can also take some time.
Image source: techloris.com - Close PowerShell and restart the computer.
Check the Disk with File Explorer
File Explorer offers a simple way to check a drive for errors:
- Press Windows + E or click the File Explorer icon in the Start menu.
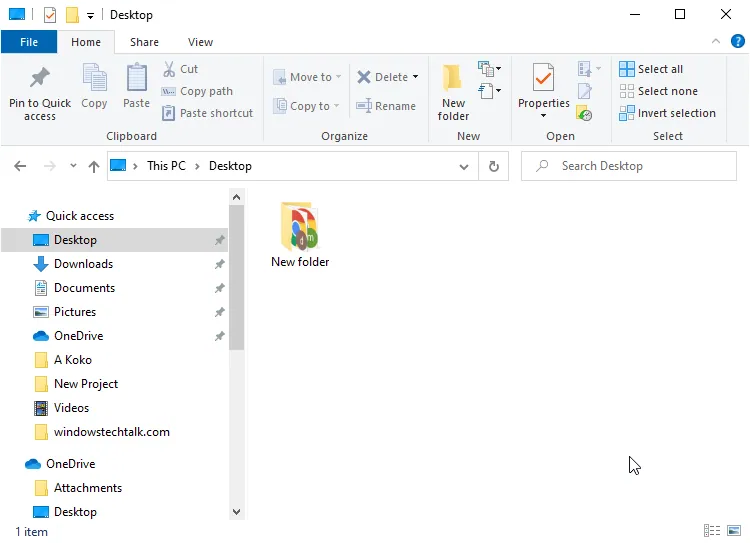
- Click This PC, right-click the drive you want to check (usually C:) and choose Properties.
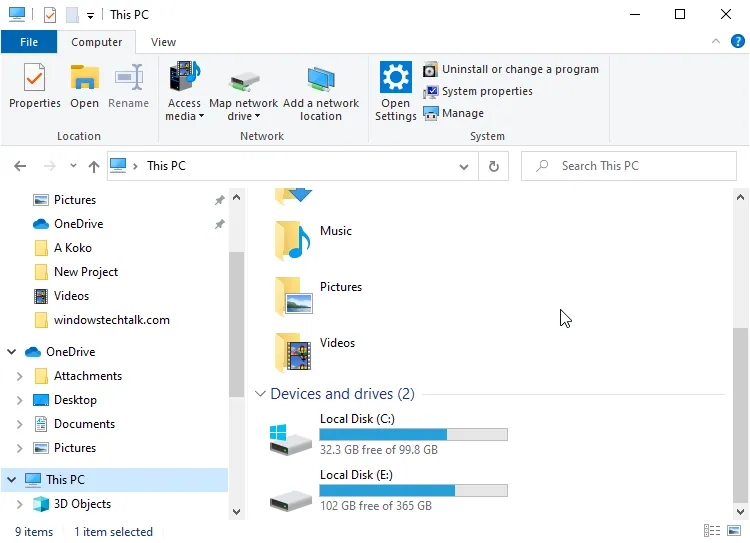
- Open the Tools tab and click Check under Error checking.
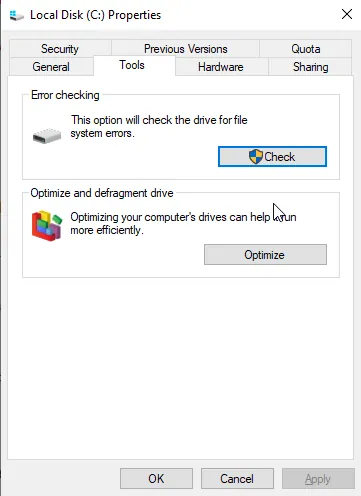
- When the scan finishes, you can repair any errors it found.
Test Your RAM with Windows Memory Diagnostic
Windows 10 has a built-in tool that checks your memory for errors:
- Type Windows Memory Diagnostic in the Start menu and open it.
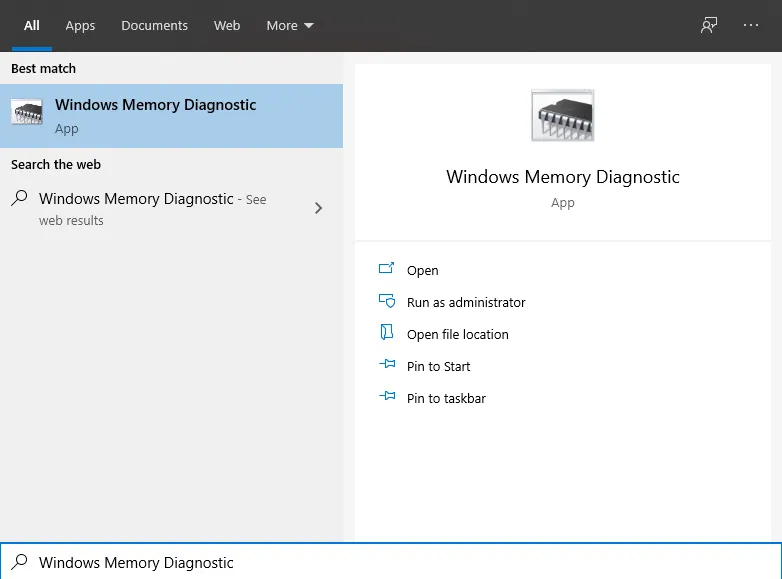
- Choose Restart now and check for problems.
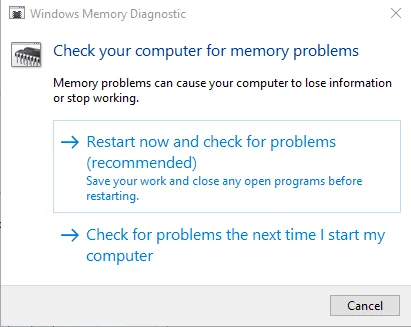
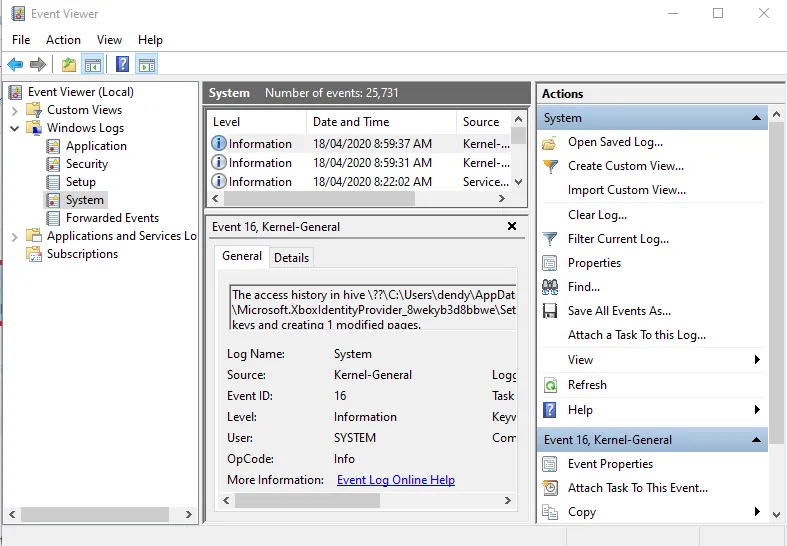
- The computer restarts and tests its memory. The test can take a while; do not interrupt it. When Windows has fully restarted, type event in the Start menu and open Event Viewer.
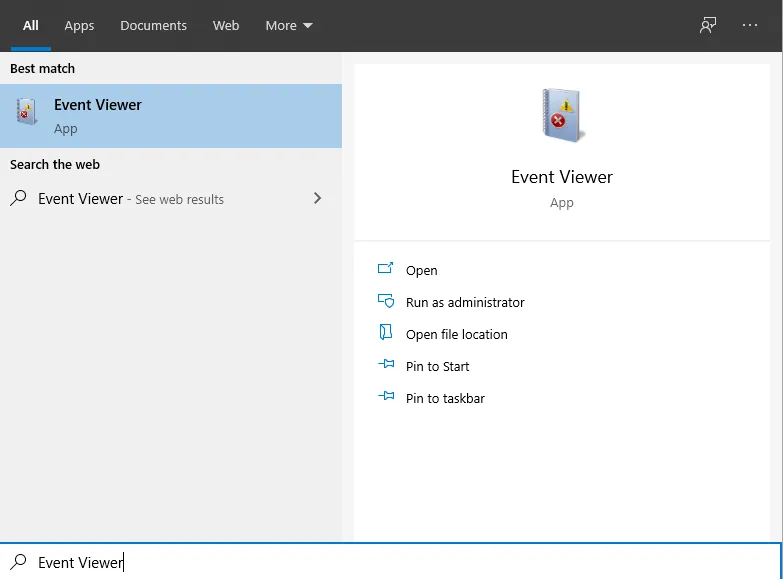
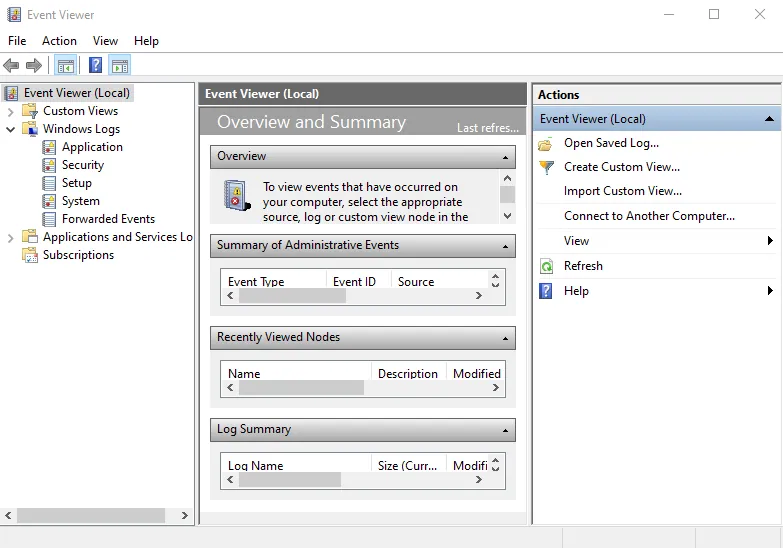
- In the left pane, expand Windows Logs and click System once.
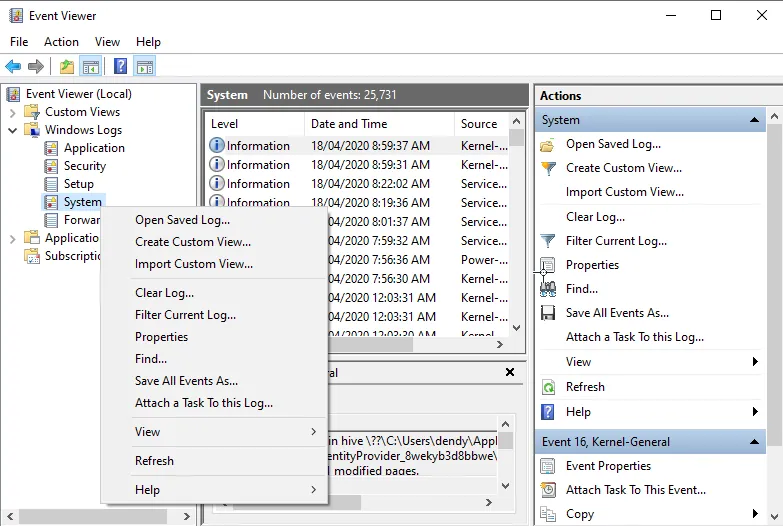
- Now right-click System and choose Filter Current Log. (The option only appears once System has been selected with a left-click.)
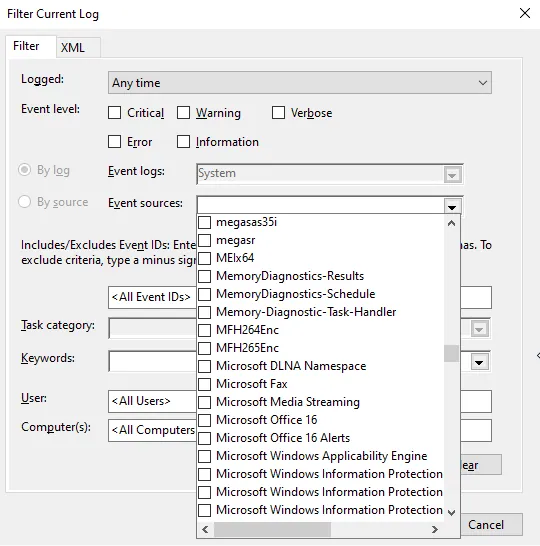
- Open the Event sources drop-down, scroll down the long list to MemoryDiagnostics-Results, tick it and click OK.
- You should now see one or two events. Click each one and read the details. If no errors were found, your RAM is fine and you can move on to the next fix.
If errors were found, the only fix is to replace the faulty memory. To find out which module is bad, shut down the PC, remove all modules except one, and repeat the test; do the same for each module. Replace any module that shows errors, ideally with RAM recommended by your PC or motherboard manufacturer, then check whether the blue screen is gone.
Find and Update Faulty Drivers with Driver Verifier
If you recently upgraded to Windows 10 or have not updated your drivers in a while, this is one of the most important fixes. You could go through every driver in Device Manager, but Windows includes a developer tool called Driver Verifier that quickly lists the most suspicious ones: drivers built for older versions of Windows and unsigned drivers.
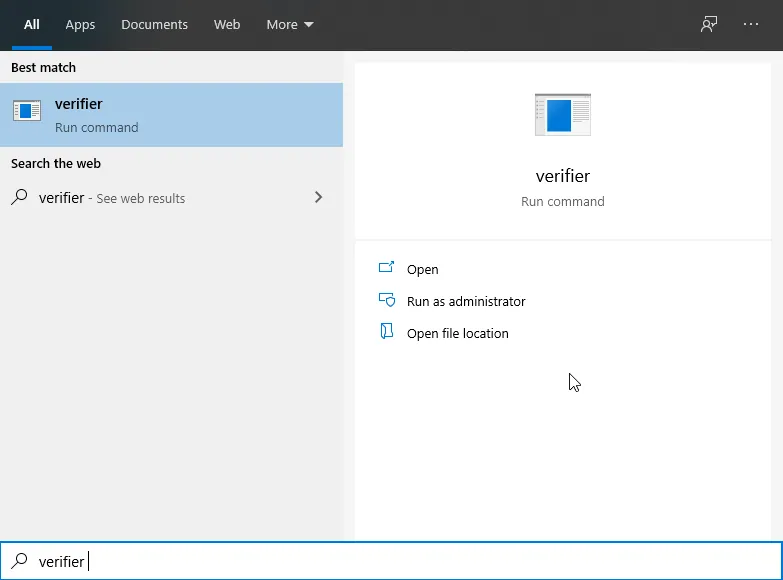
- Type verifier in the Start menu, right-click the result and choose Run as administrator. Click Yes to allow it.
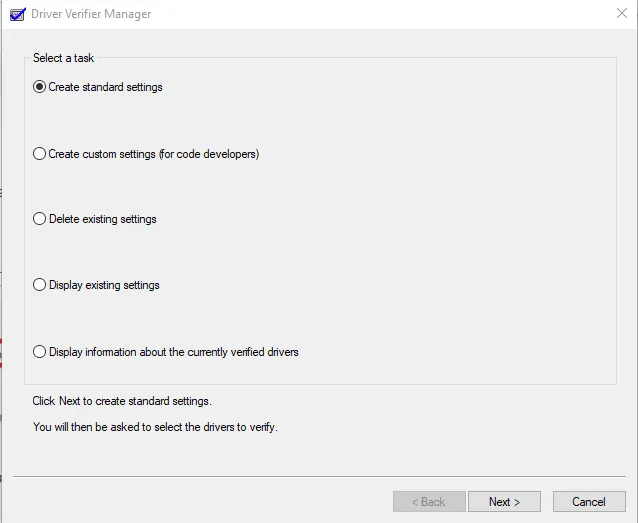
- In Driver Verifier Manager, select Create standard settings and click Next.
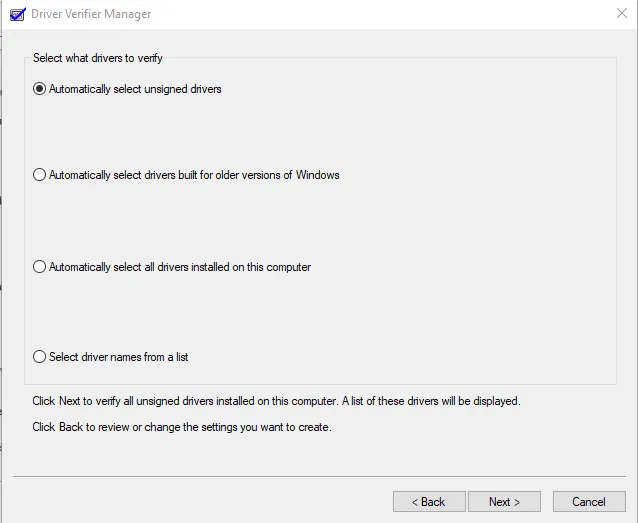
- Select Automatically select drivers built for older versions of Windows and click Next.
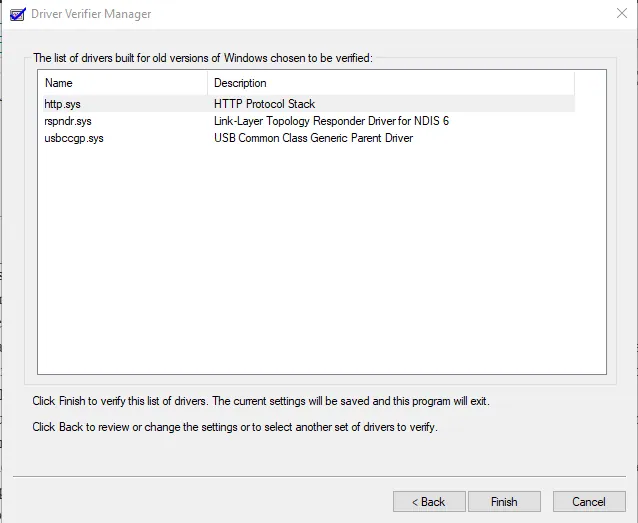
- Write down every driver that appears in the list. Then click Back, choose Automatically select unsigned drivers, click Next and note any additional drivers. Finally, click Cancel. Do not let the tool actually run its verification: that deliberately stresses drivers and can crash the computer, and it is intended for IT professionals.
- Press Windows + X and choose Device Manager.
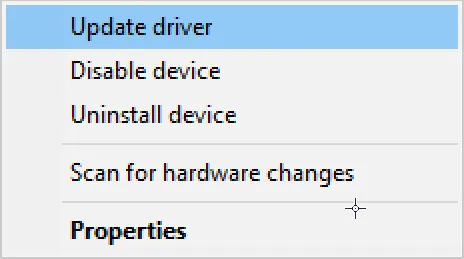
- Find the device for each driver on your list, right-click it and choose Update driver.
- Choose Search automatically for updated driver software. Alternatively, note the driver version, check the manufacturer's website for a newer one, and install it manually.
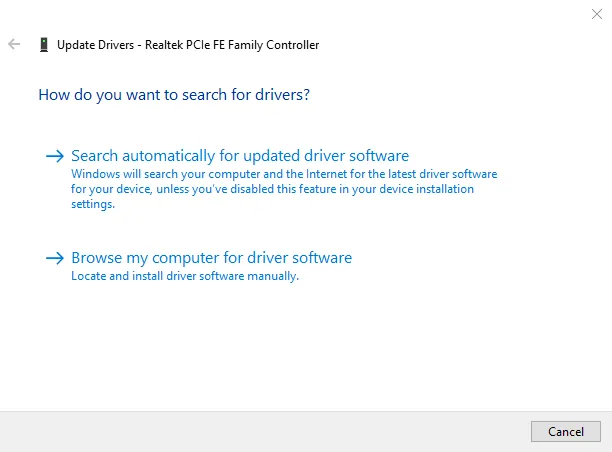
- Windows either installs a newer driver or tells you the best driver is already installed.
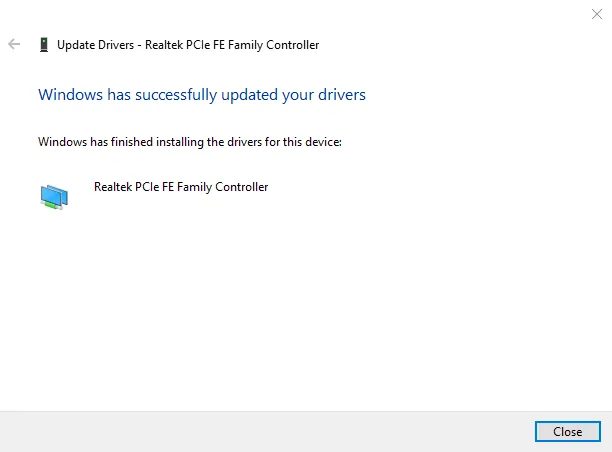
- Repeat for every driver on your list, then restart the computer.
If the blue screen continues, go back to Device Manager and this time uninstall each listed driver one at a time, restarting after each so Windows can reinstall it (or reinstall it yourself from the manufacturer's site). If that still does not help, update every driver on the system, because Driver Verifier only flags drivers that are old or unsigned, not signed drivers that simply have a newer version.
Use System Restore
This fix only works if a restore point was created before the blue screens began. It undoes recent changes to programs, drivers and settings, but it does not touch your personal files.
- Open Settings from the Start menu.
- Click Update & Security.
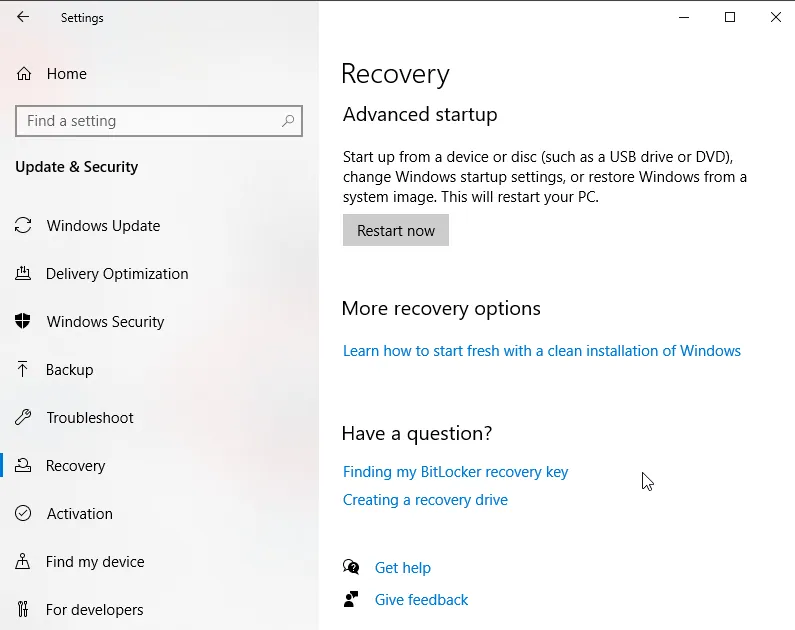
- Choose Recovery on the left and click Restart now under Advanced startup.
- On the Choose an option screen, select Troubleshoot > Advanced options.
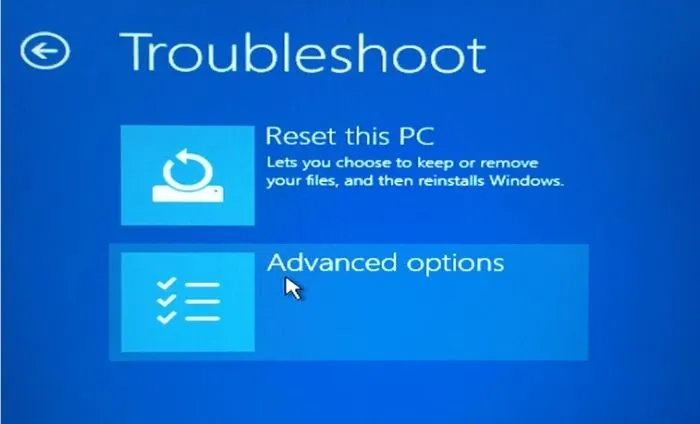
Image source: Into Windows - Choose System Restore.
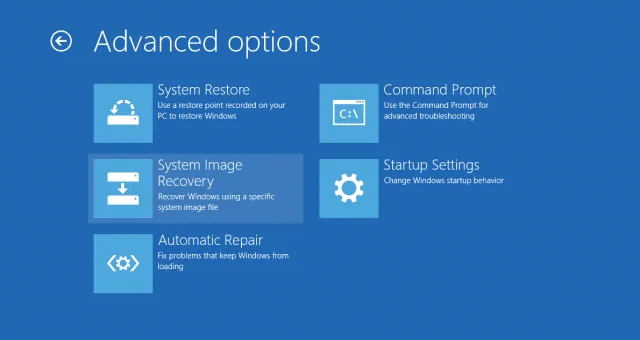
Image source: Ars Technica
If you have several restore points, pick one from before the blue screens started. Afterwards, Windows may reinstall some updates. Do not interrupt this, or you risk the blue screen or other errors returning.
Reset Windows 10
Resetting Windows 10 is a good option if the PC used to work fine and you have no restore point. You will probably need to do it from Safe Mode, and you should back up your files first.
- Press Windows + X and choose Settings.
- Go to Update & Security > Recovery and click Get started under Reset this PC.
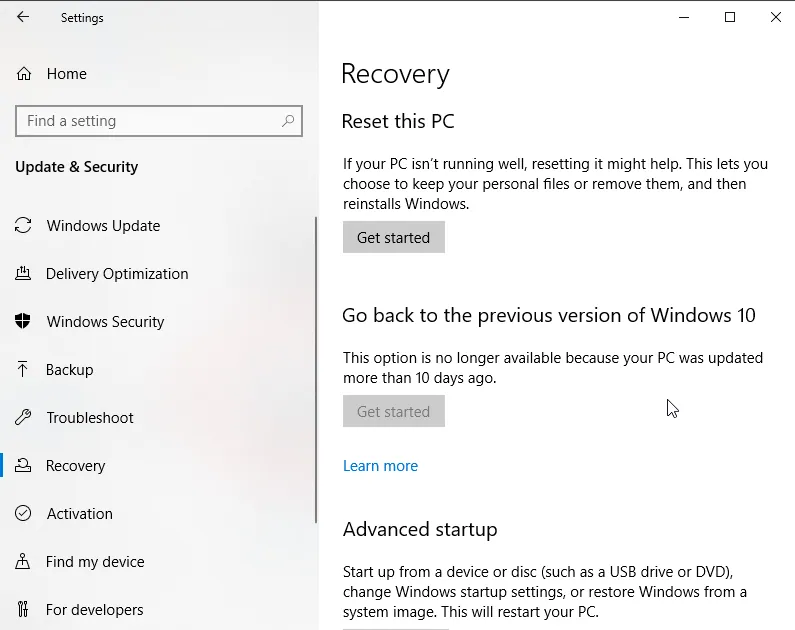
- Choose Keep my files or Remove everything and follow the prompts. Even if you keep your files, make sure your backup is up to date.
Clean Install Windows from a USB Drive
A clean installation wipes the drive and installs a fresh copy of Windows, which removes every software cause of the blue screen. Note that this process does not apply to Windows 10 Enterprise or Education editions.
Before You Start
- You need an internet connection, the bootable USB drive created earlier (16 GB recommended) and a PC that meets the Windows 10 system requirements.
- Back up all your documents and files, because the clean install erases them. A separate system image backup is a good safety net in case something goes wrong.
- Back up the recovery partition and any other partitions too: all partitions and their data are deleted.
- Sign in with a Microsoft account and make sure Windows and your other Microsoft software are activated on it. This makes reactivation much easier afterwards.
- All apps that did not come with Windows will be gone, including Microsoft Office and the manufacturer's support apps. Make sure you have the installers, licenses and product keys you need to reinstall them.
- Some digital content and licenses may be lost, even for apps you paid for. Check with each vendor (including Microsoft for Office) how to keep or transfer your license.
- Note which drivers your hardware needs (Device Manager > device Properties shows the name, manufacturer and version) and download them to a USB stick in advance.
- Check that your BIOS is set to the right boot mode (UEFI or legacy/compatibility mode).
- Disconnect all external drives and USB sticks except the Windows installation drive, so nothing else is overwritten by mistake.
Install Windows
- With the bootable USB drive plugged in, type Settings in the Start menu and open it.
- Select Update & Security.
- Click Recovery, then Restart now under Advanced startup.
- On the Choose an option screen, click Use a device and select your USB drive.
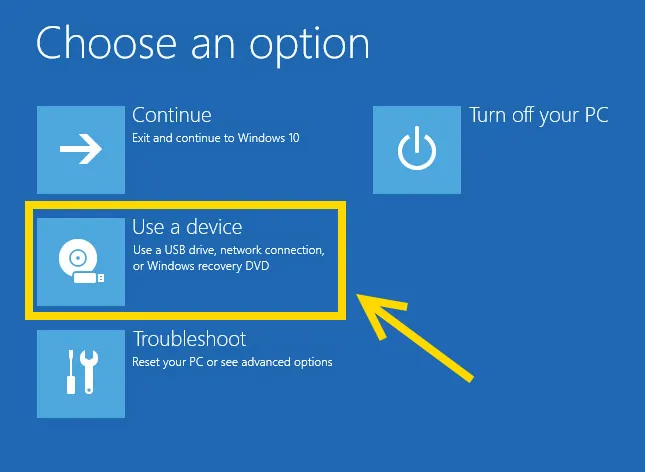
Image source: pcwinrecovery.com - Follow the prompts for language and keyboard until you reach the Install now button, and click it.
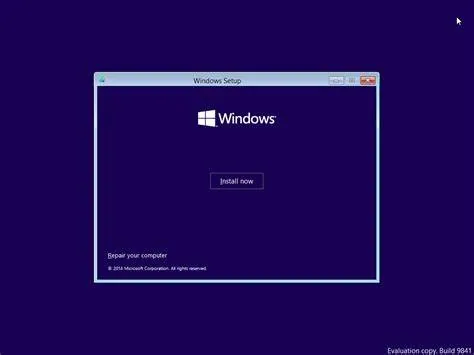
Image source: techzend.com - If you do not have a product key, choose I don't have a product key; Windows activates automatically if this PC had a digital license. Select the same edition you had before. You cannot change it later in this process without starting over. Click Next.
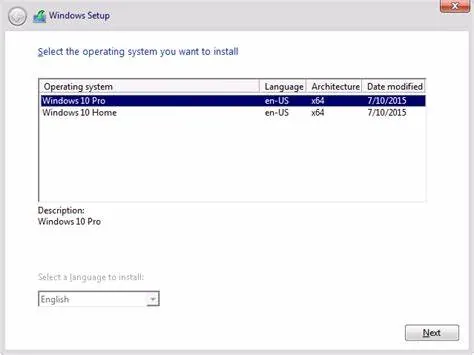
Image source: lowefamily.com.au - Read the license terms, tick the box to accept them and click Next.
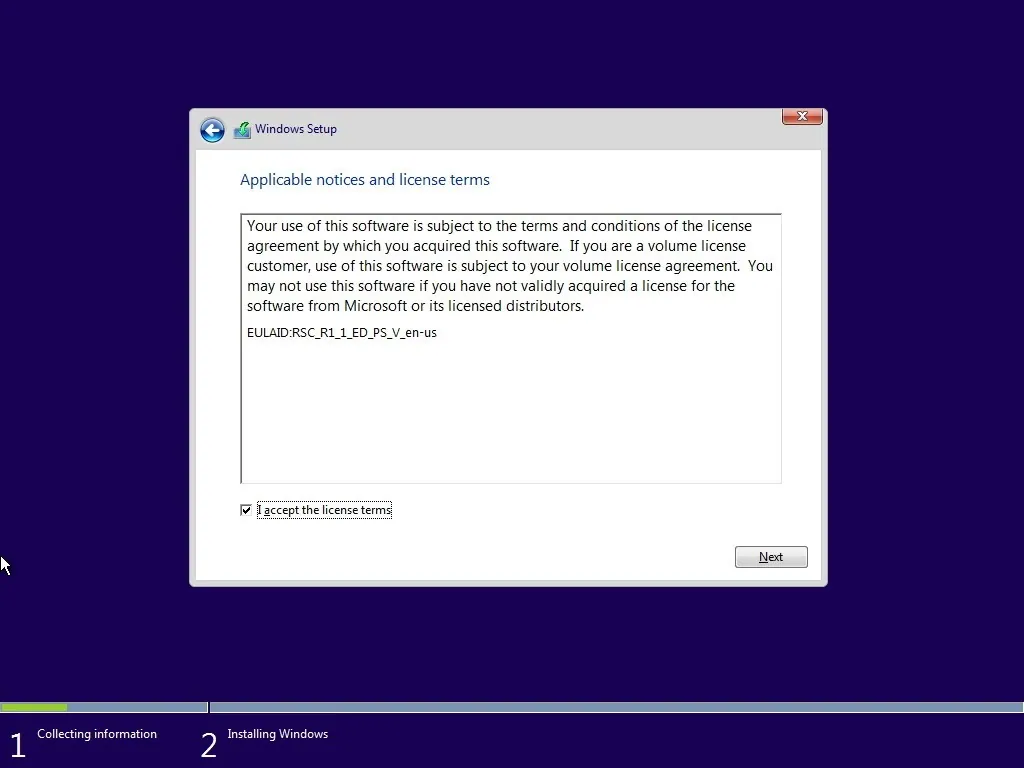
Image source: thewindowsplus.org - Click Custom: Install Windows only (advanced). If setup reports a missing driver at this point, restart the setup; when you return to this screen, carefully remove the USB drive while it is not active, click the option, and reinsert the drive when prompted. Removing the drive while it is being read can corrupt it, so be careful.
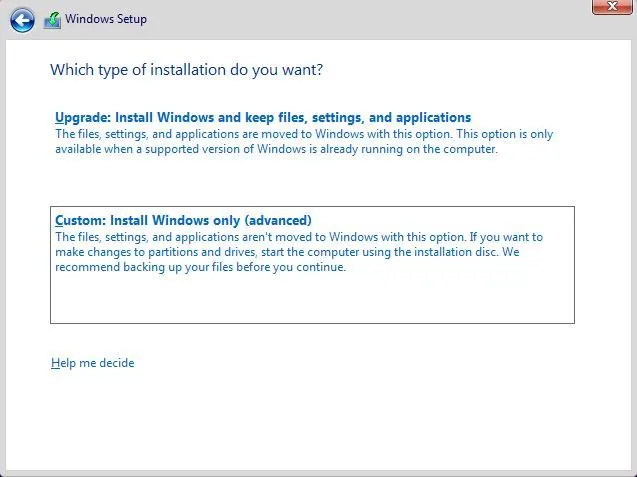
Image source: technig.com - Choose where to install Windows. If you see several partitions, delete them one by one (make sure you do not select the USB drive) until only Drive 0 Unallocated Space remains. Select it, click New, then Apply and OK. Windows creates the partitions it needs, including a small system reserved one. Select the largest (primary) partition and click Next.
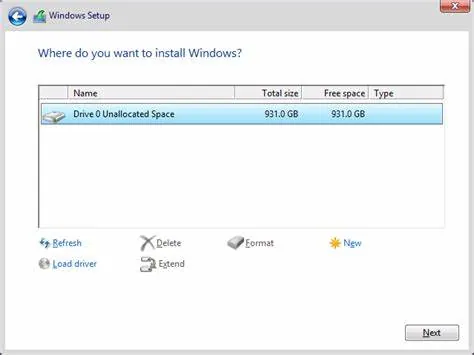
Image source: linustechtips.com - Be patient while Windows installs. It restarts several times and then guides you through the setup screens. Afterwards, check for updates straight away, reinstall your drivers and apps, adjust your settings and restore your files from the backup.
Roll Back to a Previous Version of Windows
Sometimes your software or hardware simply does not get along with the latest version of Windows 10, and going back to the previous version is the only fix. Keep in mind:
- Since the Windows 10 Creators Update, you only have 10 days after an upgrade to roll back this way.
- The option disappears if the C:\Windows.old folder has been deleted, for example by Disk Cleanup, and cannot be recovered from the Recycle Bin. (If you made a recovery drive before upgrading or have a Windows 7 or 8.1 product key, you can still reinstall the old version that way.)
- You may need to do this from Safe Mode, and you should back everything up first.
- Open Settings from the Start menu.
- Select Update & Security.
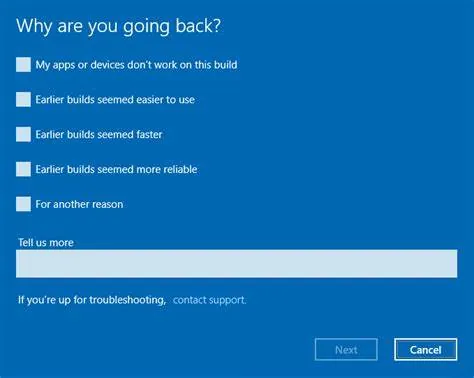
- Click Recovery. If rollback is available, you will see Go back to the previous version of Windows 10. Click Get started, choose a reason for going back and click Next.
- Windows offers to check for updates first. You have already done that, so click No, thanks.
- The next screen reminds you to keep a laptop plugged in, that you will need to reinstall some apps and redo some settings, and that you should have a backup. Click Next.
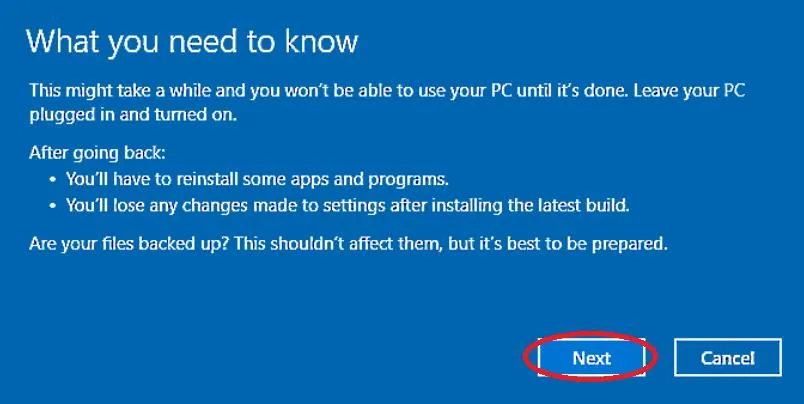
Image source: techloris.com - Windows warns that you will need the password you used with the previous version. If you do not remember it, you will be locked out after the rollback. If you do, click Next.
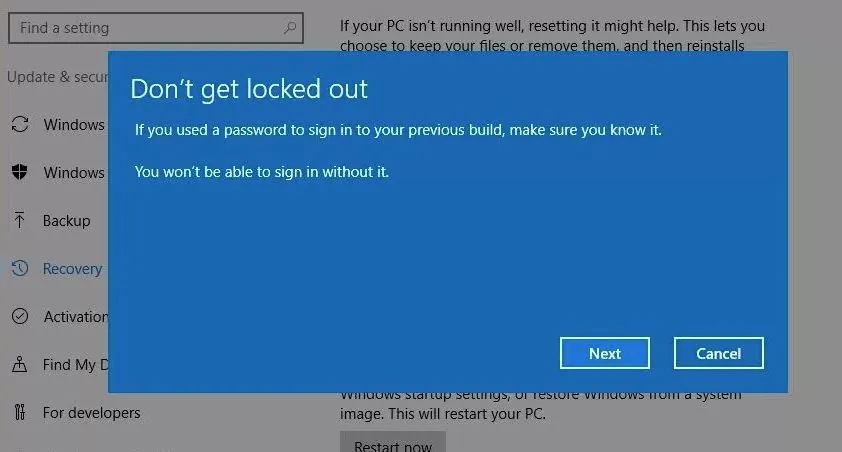
Image source: wintechlab.com - Click Go back to earlier build. Windows restores the previous version, which can take a long time, so be patient.
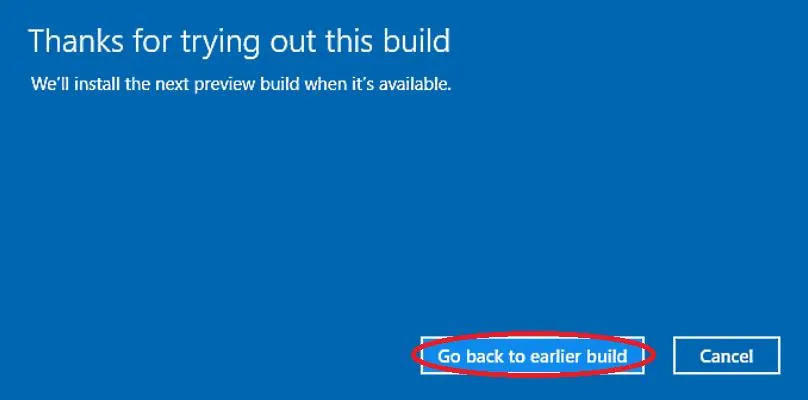
Image source: techloris.com
Update Your BIOS/UEFI Firmware
An outdated BIOS is a rare cause of Kernel Security Check Failure, but it does happen, particularly for errors related to the motherboard and built-in hardware. On modern PCs the BIOS has been replaced by UEFI firmware; the terms are used interchangeably here.
A BIOS update carries real risk: if it is interrupted by a power cut, or you miss a step in the manufacturer's instructions, the motherboard may stop working. Only attempt it if you are an experienced user and are fairly sure the problem is hardware-related. The exact process differs between manufacturers, so always follow their instructions. Where possible, flash the BIOS from within the BIOS/UEFI itself rather than with a Windows-based flashing tool, which is more likely to fail.
- Find the exact make and model of your motherboard. On a laptop, the laptop's make and model is usually enough. On a desktop, you may find it in System Information or printed on the board itself; avoid opening the case if you are not comfortable doing so.
- Check your current BIOS version: type msinfo in the search bar, open System Information and look at BIOS Version/Date. Compare it with the latest version on the manufacturer's support page. If you already have the latest version, skip this fix.
- Download the newest BIOS from the manufacturer's website, unzip it if necessary, and copy it to a USB drive.
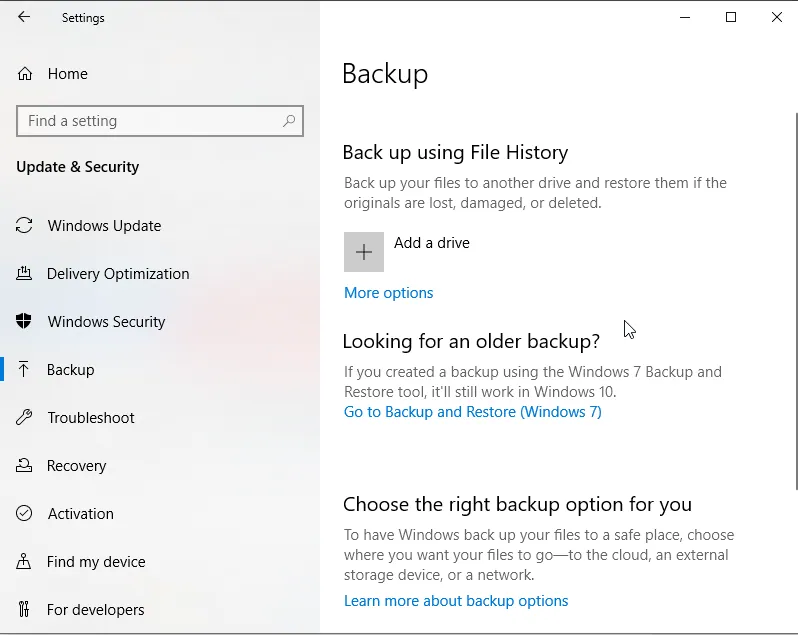
- Back up your files. To back up just your personal folders: open Settings > Update & Security > Backup, insert a large enough USB drive, click Add a drive and select it, make sure automatic backup is on, then open More options, choose the folders and click Back up now.
- Back up the current BIOS too, if the manufacturer's tool allows it (it is sometimes part of the update process). If the update fails, a backup makes recovery much easier for a technician.
- Read the manufacturer's instructions completely and change any settings they require.
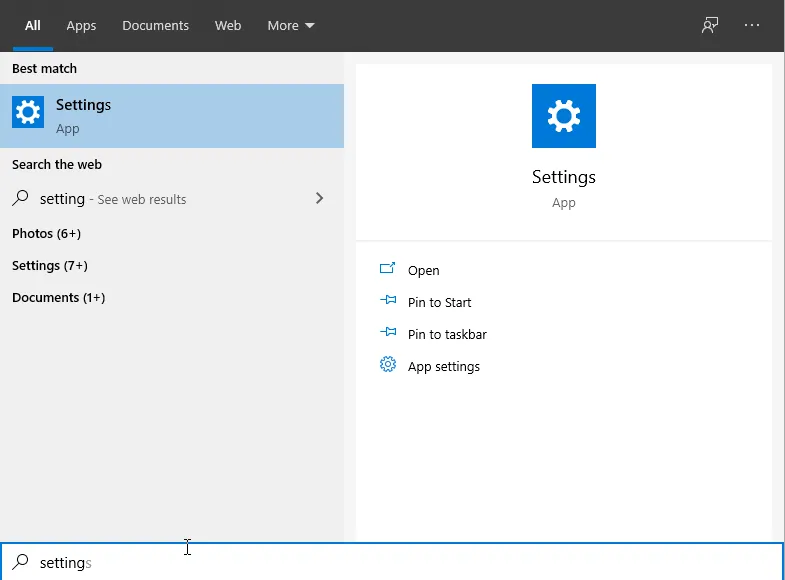
- Type Settings in the search bar and open it.
- Go to Update & Security > Recovery and click Restart now under Advanced startup.
- On the Choose an option screen, select Troubleshoot.
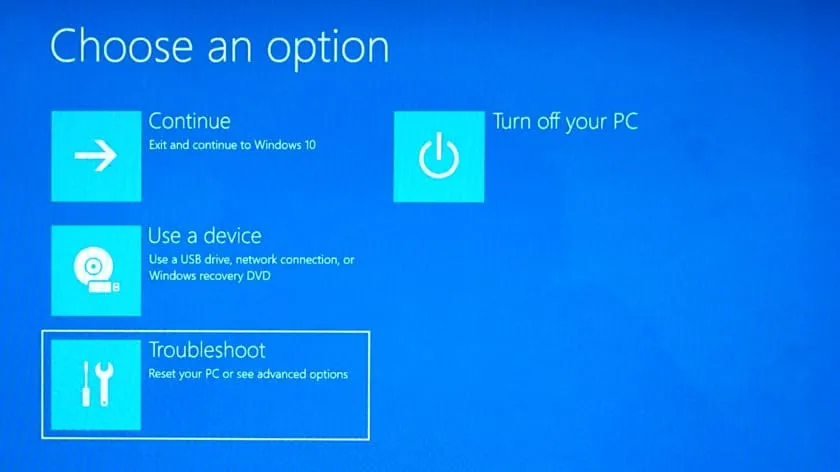
Image source: Android Authority - Select Advanced options.
Image source: Into Windows - Select UEFI Firmware Settings and click Restart.
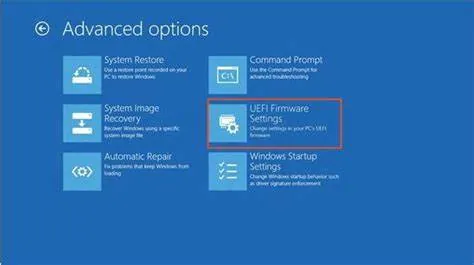
Image source: lostwindowspassword.com - In the BIOS/UEFI, find the option to update or flash the BIOS and follow the on-screen instructions. Do not touch the computer while the update runs, and do not turn it off until you are sure the update has finished.
- Restart when prompted. Enter the BIOS once more to check the settings, especially the date and time, then restart into Windows. Your files and Windows should be unaffected.
Scan the Hard Drive with CHKDSK
Disk errors and inconsistencies on the drive can also trigger this blue screen. In Windows 8 and 10, the NTFS file system detects and repairs many problems automatically in the background, so a full offline check is needed less often than in older versions. It is still worth running one manually when you are troubleshooting blue screens, and occasionally as maintenance, since improper shutdowns and faulty software can leave errors behind.
Open Command Prompt as administrator, run chkdsk c: /f, and confirm that the check should run at the next restart. Then restart the computer.
Kernel Security Check Failure FAQ
What causes Kernel Security Check Failure?
The most common causes are incompatible or outdated drivers and conflicts between installed programs. Memory problems, virus infections, corrupted Windows system files and hard drive errors can also trigger it.
What does the Kernel Security Check Failure stop code mean?
It is one of the stop codes shown on the Blue Screen of Death. It means Windows found corruption in one of its critical data structures, usually caused by a memory problem, a virus, a software conflict or an incompatible driver, and shut down to protect the system.
What does 0xc000021a mean?
0xc000021a is a different stop code that appears with the message "Your PC ran into a problem and needs to restart." It is usually caused by a damaged registry, corrupted device drivers or incompatible software, and many of the fixes in this guide apply to it as well.
Sources: partitionwizard.com, techgenix.com, wintips.org, drivereasy.com